Showing posts with label Breakfast. Show all posts

Thursday, November 21, 2013

Peanut Butter & Banana Pancakes

I found this recipe last night in a Health Magazine.  Good timing, since Thursdays are "Pancakes & Bacon for Lunch" days in our house.  Peanut butter & banana is such an awesome combination, I figured these would go over well- and they did!  I liked that they were healthy and easy to make, and the kiddos loved them for the taste.

I only made two changes to the recipe.  One change was to cut the batch in half (which is how I have it written below).  It was just right for my 3 kids, plus two for me.  I would definitely do the full batch if I were cooking for all five of us.  The other change I made was to mix the wet ingredients in the blender.  Especially since it calls for a mashed banana, I figured that would be an efficient way to mix it.  I will continue doing it that way in the future, but you could do it either way.

Enjoy!  Oh, and FYI, my favorite way to cut up pancakes (for the kiddos) is with a pizza cutter!  Nice & easy!

Peanut Butter & Banana Pancakes
Printable version here

1 cup buttermilk
1 large egg
1/2 tbsp. vegetable oil (or melted butter)
2 tbsp. peanut butter
1 banana
3/4 cup flour (such as whole wheat pastry flour or all-purpose)
1 tsp. baking soda
1/4 tsp. salt

1. Combine wet ingredients (buttermilk through banana) in blender and process until smooth. (Alternately, whisk well in a bowl, mashing the banana before adding the rest of the wet ingredients.)  Whisk together flour, baking soda, and salt in a medium bowl.  Add wet ingredient mixture and stir until no streaks of flour remain.

2. Preheat a griddle to medium-low.  Cook pancakes until golden brown on both sides. (I portion them out with a 1/4 cup measuring cup)

Yield: 3-4 servings (about 14 pancakes)

Recipe Source: Health Magazine Jan/Feb 2013, recipe by Todd English, slightly adapted

Why I love it? As I wrote above, they were easy to assemble, cooked up perfectly, and they were delicious!  The peanut butter and banana flavors were noticeable without being overwhelming.

Monday, November 18, 2013

Pumpkin Pie Oatmeal


Until a few months ago, when I tried this Blueberry Baked Oatmeal, I had no idea how fantastic baked oatmeal could be.  Not only does it take on a new texture (a little firmer & less gooey), but when it's baked, it reheats wonderfully!  This means you can bake a dish once, then have it for breakfast for the next few days!  This recipe tastes just how it sounds- like Pumpkin Pie + Oatmeal.  So if you're like me and like those two foods, you'll want to give this a try!

Pumpkin Pie Oatmeal


1 cup old fashioned oats
1 tbsp. flax seeds (optional)
2 tbsp. brown sugar, packed
½ tsp. cinnamon*
¼ tsp. allspice
⅛ tsp. nutmeg
½ tsp. lemon zest
¼ tsp. salt
½ tsp. vanilla
2 tsp. butter, melted
¾ cup pumpkin puree
¾ cup milk


Topping:
¼ cup pecans, chopped
2 tsp. butter, softened
1 tbsp. brown sugar


*You may substitute 1 tsp. pumpkin pie spice for the three spices, or use all cinnamon*


Preheat oven to 375º.  Grease 4 individual size ramekins (about 1 cup size).  Set aside.


Combine the oats through salt in a medium sized bowl.  Stir well.  In a separate bowl, combine the vanilla, butter, pumpkin, and milk.  Whisk thoroughly.  Pour the pumpkin mixture into the oats.  Stir until combined.


Divide mixture evenly between the ramekins.  Place ramekins on a baking sheet (to make it easier to get in & out of the oven).  Bake for 10 minutes.


Meanwhile, combine the topping ingredients in a separate bowl.  After the oatmeal has baked for 10 minutes, remove and divide topping mixture evenly between the ramekins.  Bake an additional 7 minutes.  Cool for 5 minutes before serving.  Top with a splash of milk, if desired.
 
Recipe Source: http://www.goodlifeeats.com/2009/09/pumpkin-pie-oatmeal.html  


Why I love it? It's like a pumpkin pie that is socially acceptable to eat for breakfast! :) It's delicious, fairly healthy, and keeps/reheats well.

Wednesday, September 11, 2013

Blueberry Baked Oatmeal


I don't know about you, but I have a thing for 1) Blueberries & Lemon, and 2) Make-Ahead-Breakfasts!  I found this recipe one time when I was searching for healthy recipes that use blueberries.  Blueberry muffins are great, but not healthy enough that I'd want to eat them every day... This recipe, though, is a winner!

It's easy to make, healthy (full of fiber, vitamin C, and antioxidants), and it reheats great!  I reheat a serving in a cereal bowl (about 30 seconds in the microwave), and sometimes top it with a little bit of milk.  It's perfect for those busy school or work mornings!  If you haven't tried baked oatmeal yet, you should give it a shot!  It keeps 100x better than just regular cooked oatmeal. 

Blueberry Baked Oatmeal
Printable version here

1 medium lemon
2 cups nonfat milk
2 1/2 cups old-fashioned rolled oats
1 tsp. baking powder
1/2 tsp. kosher salt (or 1/4 tsp. table salt)
1/2 tsp. nutmeg, freshly grated if possible
1/2 tsp. cinnamon
2 tbsp. butter, melted and cooled
1 egg
1/3 cup sugar
2 cups blueberries, fresh or frozen

1. Preheat the oven to 375º.  Spray an 8-inch square baking dish with nonstick spray and set aside.

2. Zest lemon; set zest aside (remember you only want the yellow parts, not the white underneath). In a bowl, combine milk and juice from the zested lemon to make "buttermilk".

3. In a medium bowl, combine the oats, baking powder, salt, spices, and lemon zest.  In a small bowl, whisk together the "buttermilk", butter, egg, and sugar.

4. Spoon half of the oat mixture into the baking dish, and then half of the blueberries.  Add the remaining oat mixture and scatter the remaining blueberries on to the top, pressing them in slightly.  Pour in the milk mixture and place in oven.

5. Bake for 35 to 45 minutes, or until the mixture is a light golden brown along the edges, and the center has set up.  Serve warm.  Store leftovers in the refrigerator in a covered dish for up to 5 days.

Recipe Source: http://www.preventionrd.com/2012/06/meatless-monday-meyer-lemon-blueberry-baked-oatmeal/ 

Why I love it? I love that it's a delicious way to eat two very nutritious foods- oats and blueberries!  The fact that it reheats well is a bonus! 

Wednesday, July 17, 2013

English Muffins


This is a post I've been working on for a looooong time, believe it or not!  I wanted to make sure that I had enough information to share, since English muffins aren't typically something a person has made before.  I have now made these probably a couple dozen times.  The summary of why I make these, if you don't read the whole post- they are delicious and significantly cheaper than store-bought!

The breakfast my husband has most days before work (when the rest of us are still sleeping) is an egg sandwich- with a baked egg patty, reduced-fat sausage patty from Costco, a little grated cheese, and an English muffin.  Seeing as how I make most of our other bread products, I decided to tackle English muffins, as well.  I found this recipe from Alton Brown (Mr. Good Eats) and it works very well!  I altered it very slightly.

The only equipment I needed to buy to make these was English Muffin Rings.  I tried making this recipe using other things as rings, like some suggest, but these work FAR better- and were only 8 bucks.  I have saved more than that already!  Besides that, it is helpful to have a covered electric skillet (good for maintaining even heat) and a large cookie scoop for even portioning.

Last thing- I have made variations of this, as well.  I normally make them with half wheat/half white flour, and sometimes I make them with a little extra sugar and cinnamon.  It's a pretty flexible recipe!

The equipment ready to go

The dough is so wet, it's almost more like a batter

I cook 4 muffins at a time

Finishing up cooking on the 2nd side

You can read more about these muffins on Food Network's website, here.

Price Breakdown
Yeast 5¢
Powdered Milk 36¢
Sugar 1¢
Salt <1¢
Canola Oil 3¢
All-Purpose Flour 12¢
Wheat Flour 16¢
Water- Free
TOTAL = 73¢ per batch of 8 English Muffins

Weight of one batch: 1 lb. 5 oz.
Price per ounce: 3.5¢

Comparable store-bought English muffins: $1.68 for 14 ounces = 12¢ per ounce

Price Comparison per ounce: 3.5¢ homemade vs. 12¢ store-bought = 71% SAVINGS!

English Muffins
Printable version here

2 1/4 tsp. instant yeast (1 packet)
1 1/8 tsp. granulated sugar, divided
1/2 cup powdered milk
1 tsp. salt
1 tbsp. canola oil (or other neutral-flavored oil)
2 cups flour (I use 1 cup each all-purpose and wheat)

1. In a measuring cup or small bowl, combine and set aside to rest:
  • 2 1/4 tsp. yeast
  • 1/8 tsp. sugar
  • 1/3 cup warm water
2. Meanwhile, combine in a large bowl and stir until dissolved:
  • 1/2 cup powdered milk
  • 1 tbsp. sugar
  • 1 tsp. salt
  • 1 tbsp. canola oil
  • 1 cup hot (but not boiling) water
3. Once yeast mixture is a little bubbly, pour into milk mixture and whisk to combine. (Make sure the milk mixture isn't too hot, as yeast die at temperatures above 130º)  Add to this mixture and stir:
  • 2 cups flour
4. Cover bowl with plastic wrap and let rest in a warm spot for 30 minutes. (I like to turn on my oven for 1-2 minutes while I'm preparing the dough, then I let dough rest in there.)

5. Preheat griddle to 300º (when I use wheat flour, I set the heat just a little under that).  Remove plastic wrap and stir dough thoroughly.

6. Place metal rings onto griddle and coat lightly with nonstick spray. Using large (3 tbsp.) cookie scoop, place 2 scoops into each ring and cover with a lid.  Cook for 4 1/2 to 5 minutes, flip (I like to use 2 flat spatulas for this), then recover and cook 4 1/2 to 5 more minutes. (I do 4:45) Cool on a wire rack, split with fork, and serve.

Yield: 8 muffins
Storage: Store in an airtight container (or zip-top bag) at room temperature for up to 3 days.  Freeze for longer storage.
Recipe Source: Alton Brown/Food Network

Why I love it? Let's see, they're INFINITELY fresher tasting than the kind you buy in a store, there are no preservatives, you can customize them (with different types of flour, using additional seasonings like cinnamon, etc.), and like I said above- SIGNIFICANTLY cheaper! If you're still reading, I will say- these were a little frustrating to make until I got the hang of it, but after making them a few times I figured out what works best, and now I love making them!  Let me know if you have any questions!

Tuesday, July 9, 2013

Blueberry Oatmeal Muffins


Recently I searched for a new healthy blueberry muffin recipe, and this one looked appealing.  It did not disappoint!  So many muffin recipes are more like a disguised cupcake, with things like blueberries thrown in to make it look healthy.  But these, I actually feel good about giving my kids for breakfast!  Enjoy!

Recipe Source: Cooking Light, August 2010

Blueberry Oatmeal Muffins
Printable version here

1 2/3 cups quick-cooking oats
3 ounces all-purpose flour (about 2/3 cup)
2.33 ounces whole-wheat flour (about 1/2 cup)
3/4 cup packed light brown sugar (5.3 ounces)
2 tsp. ground cinnamon
1 tsp. baking powder
1 tsp. baking soda
3/4 tsp. salt

1 1/2 cups low-fat buttermilk
1/4 cup canola oil
2 tsp. grated lemon rind (from one small lemon)
2 large eggs
2 cups frozen blueberries
2 tbsp. all-purpose flour
2 tbsp. granulated sugar (or a cinnamon/sugar mixture)

1. Preheat oven to 400º.

2. Place oats in a food processor; pulse 5 to 6 times or until oats resemble coarse meal.  Place in a large bowl.

3. Weigh or lightly spoon flours into dry measuring cups; level with a knife.  Add flours and next 5 ingredients (through salt) to oats; stir well.  Make a well in center of mixture.

4. Combine buttermilk and next 3 ingredients (through eggs).  Add to flour mixture; stir just until moist.

5. Toss berries with 2 tablespoons flour, and gently fold into batter.  Scoop batter into 18 muffin cups coated with nonstick spray. (I use a 3 tbsp. cookie scoop that's filled a little over the top, so probably close to 1/4 cup) Sprinkle tops with either sugar or a cinnamon/sugar mixture (I keep some in a shaker container).  Bake at 400º for 20 minutes or until muffins spring back when touched lightly in center.  Remove from pans immediately; place on a wire rack.  Store in a covered container at room temperature for up to a couple days, or refrigerate or freeze for longer storage.

NOTES
  • I've only ever made this exactly as written, but I'm sure you could make slight changes to it and it would still turn out well.  Such as: substituting the all-purpose flour for wheat, omitting the lemon zest (or replacing it with orange zest), using fresh blueberries instead of frozen, and using buttermilk substitute instead of buttermilk (this explains how to).
  • As I only have one regular muffin pan, I had to bake a dozen of these muffins, wash the pan, and then bake 6 more.  Sometime I might scale this recipe down to equal a dozen, but we like them so much that I don't mind the hassle of washing the pan in between batches!
Why I love it? They are hearty without being dense, flavorful (I love the blueberries & hint of lemon!), and decently healthy!  The large batch size lets me feed my family of 5 and still have some leftover to freeze.

Thursday, October 4, 2012

Banana Muffins


So... I have an addiction that I think many of you might understand!

That addiction is... searching for new recipes!  Not a big surprise, huh?  I already have enough recipes to probably make something different each day of the year, yet I still can't stop looking.  This recipe is one example of why!  I have so many muffin recipes, but when I saw this one recommended online, I had to give it a try.

We are hooked on it!  It uses no fancy ingredients or equipment, yet the muffins come out fabulous!!  They are so flavorful and so soft.  The author of the blog where I found this recipe says that they taste even better the next day- that is, assuming you have any left!

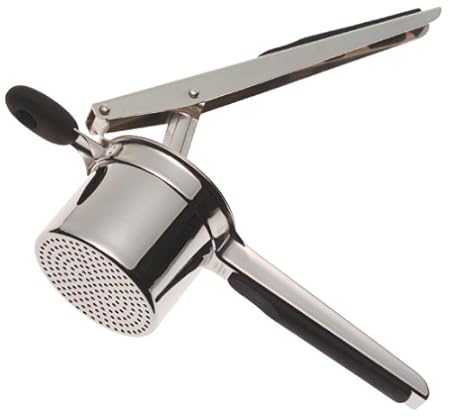
One tip I have for this recipe is about how I mash bananas.  Last year for my birthday I asked for a potato ricer (it makes great mashed potatoes), and I found it also works great for mashing bananas!  This is the one I have.


Before I got that though, I would mash bananas by putting them in a ziploc bag, closing it, and mushing them that way.  The ricer is just a little more fun though. :)

Recipe Source: http://www.catcancook.com/awesome-banana-muffin-recipe/

Banana Muffins
Printable version here

3 or 4 large bananas, mashed
1/2 cup white sugar
1 slightly beaten egg
1/3 cup melted butter
1 tsp. baking soda
1 tsp. baking powder
1/2 tsp. salt
1 1/2 cups flour
1/3 cup mini chocolate chips and/or chopped walnuts (optional)

1. Mix the mashed banana, sugar, egg and butter together. Set aside. In a separate bowl, mix together baking soda, baking powder, salt and flour.  Mix wet and dry ingredients all together. Stir in chocolate chips and/or nuts. Pour into greased or paper-lined muffin tins. (I use a large cookie scoop for this.)

2. Bake at 350º for approximately 20 minutes.  Remove to a wire rack to cool.  Enjoy!

Yield: 12 muffins

Why I love it? They are simple, use ingredients I almost always have, and are so light & delicious!!  I would much rather give the kids one of these as a snack than something packaged.  It's just so good knowing exactly what they're eating! :-)

Wednesday, October 3, 2012

Baked Egg Patties


I found this recipe on Pinterest recently.  Some things on that site seem too good to be true, but I was willing to spend $6 on a jumbo muffin tin to try it out.  Well, I am thoroughly impressed!!  Look how simple it is!


Bake for 20 minutes @ 325º, and you get this!


Presto!  It makes for the easiest breakfast sandwiches ever!  I also tried this recently with only egg whites, and I'm pleased to say it works just as well!  You use 2 egg whites per muffin cup. (I had leftover egg whites to use up after making this delicious homemade egg nog.)

Recipe source: http://www.theyummylife.com/Egg_McMuffin 

Baked Egg Patties
Printable version here

6 large eggs*
Salt & pepper

1. Preheat oven to 325º.  Spray a jumbo muffin pan with nonstick spray.  Break one egg into each muffin well; poke yolk to crack it open.  Sprinkle with salt & pepper.

2. Bake for 20 minutes, or until desired doneness.  (At 20 minutes the yolks & whites are firm) Serve or refrigerate in a covered container.  Reheat in microwave for about 20 seconds.

*You can either use 6 whole eggs, or 12 egg whites.  If using only whites, whisk gently in a medium bowl, then pour 1/4 cup whites into each muffin cup (or break eggs open over muffin cups, using 2 eggs per cup). Baking time remains the same.

Why I love it? I have tried for YEARS to cook round egg patties like this.  Nothing has turned out anywhere near this well, or as easy!  This would be perfect for serving eggs to a crowd, or you could make a batch and keep them in the refrigerator for a week's worth of easy breakfasts.

Tuesday, August 7, 2012

Zucchini Chocolate Chip Bread

 Both last summer & this summer, I have been given gigantic zucchinis from friends' gardens.  This is my favorite thing to make with it!  It makes 2 loaves, so I get to stick one in the freezer for later.  I found this recipe on allrecipes.com, and followed the changes suggested by many of the reviewers, plus threw in some mini chocolate chips for good measure. :) All of my kids love this, including my "I don't like bread" eater!

 This was my 3 cups of grated zucchini (I used a grating attachment on my KitchenAid to grate it).  My zucchini was so big, I still had 4 cups left over!


Zucchini Chocolate Chip Bread
Printable version here

3 cups flour (I use half white & half wheat)
1 tsp. salt
1 tsp. baking soda
1 tsp. baking powder
2 tsp. cinnamon
3 eggs
1/2 cup applesauce
1/2 cup oil (such as canola or vegetable)
2/3 cup granulated sugar
2/3 cup brown sugar
1 tbsp. vanilla
3 cups grated zucchini, loosely packed
3/4 cup mini chocolate chips

1. Grease and flour two 8x4-inch pans, set aside.  Combine dry ingredients (flour through cinnamon) in a bowl and set aside.

2. Beat eggs, applesauce, oil, vanilla, and sugars in a large bowl until combined.  Add dry ingredients and mix well.  Stir in zucchini and chocolate chips.  Pour evenly into the two loaf pans.

3. Bake at 325º for 65 minutes, or until a toothpick comes out dry when poked in the middle of the loaf.  Cool in pan on a wire rack for 10 minutes, remove from pans, then cool completely on the rack.  Store in a covered container at room temperature for a couple days, or freeze (wrapped in plastic wrap and foil) for longer storage.

Yield: Two loaves (Alternately, you could make this into 24 muffins, and cook those about 27 minutes)

Recipe source: Adapted from this recipe http://allrecipes.com/recipe/moms-zucchini-bread

Why I love it? I asked my kids, and they said: "It has chocolate chips, and the zucchini bread tastes good...  I like it because of the chocolate, and I might not have liked the zucchini by itself, but I couldn't even taste it!  It just tastes like chocolate chip bread, that's it!" There you have it!

Wednesday, July 25, 2012

Cranberry Oat Bread


This bread has turned into one of my family's favorites!  It's healthy (low sugar, low fat, and whole grain)- but it doesn't taste healthy, know what I mean?  It's flavorful, hearty, and moist.  We love it with dried cranberries and pecans, but you could certainly swap those out for other ingredients if you'd like. 

In other news, I've been enjoying this summer with my kids & husband.  Since we finished our homeschooling year last month, we have: celebrated my oldest son's 8th birthday, done a lot of yard work/projects, gone swimming several times, and celebrated mine & my husband's 10th wedding anniversary!  We left the kids with the grandparents for 2 days and took a weekend trip to Victoria, BC.  It was great to get time away!  This is us eating lunch at a nice little pub.  It was fun not having to worry about if they had a kid's meal! :)


Cranberry Oat Bread
Printable version here

3/4 cup quick cooking oats
1 1/4 cups buttermilk
1 1/2 cups whole wheat pastry flour (or all-purpose)
1/3 cup packed light brown sugar
1 tsp. baking powder
1 tsp. baking soda
1/4 tsp. salt
2 tsp. vanilla extract
1/2 cup dried cranberries (or other small dried fruit)
1/4 cup chopped pecans, optional

1. Combine the oats and buttermilk in a medium-sized bowl.  Stir to mix well, and set aside (only until it's needed in the next step- if you wait too long, too much of the liquid will have been absorbed).

2. Combine the flour, brown sugar, baking powder, baking soda and salt in a large bowl, and stir to mix well.  Add the buttermilk mixture and vanilla, and stir just until the dry ingredients are moistened.  Fold in the fruit and nuts.

3. Coat an 8x4 inch loaf pan with cooking spray.  Spread the batter in the pan, and bake at 325º for 40-42 minutes, or just until a toothpick inserted in the center of the loaf comes out clean. (Alternately, you can turn this into 12 muffins, baked at 350º for 18 minutes.)

4. Remove the bread from the oven, and let sit for 10 minutes.  Turn the loaf onto a wire rack, and cool before slicing.  Serving suggestion- this bread is great toasted and spread with cream cheese.

Recipe source: adapted from "Secrets of Fat-Free Cooking"

Why I love it? It's lowfat, hearty (but not dense), and flavorful!  I just love this bread with cream cheese.  It keeps fairly well, and I have also frozen it for later.  Like most quick breads, it freezes and thaws wonderfully!

Thursday, June 14, 2012

Trail Mix Muffins (Mix in a Jar)


Just like my last post, here is a "Mix in a Jar" recipe.  I made both these and the oatmeal chip cookie mixes to give away as gifts to my MOPS group.  I got to keep one of these jars for myself, and I so enjoyed making it this morning- I wasn't even fully awake yet, but this was so easy I could get these going for the kids!

These muffins are pretty much what the name sounds like- full of goodies like what you would find in trail mix. (The only thing missing, according to my 5 year old, is M&M's!)  They have dried fruit, coconut, nuts, and some good whole grains.  But even with all that, they're still pretty light & fluffy.

Trail Mix Muffins (Mix in a Jar)
Printable version: Recipe
Printable version: Sheet of 6 gift tag instructions

Jar ingredients
1/3 cup sugar
1/2 cup old fashioned (or quick) oats
1/3 cup raisins (or other dried fruit)
1/2 cup flaked coconut
1/2 cup wheat germ*
1/2 cup chopped nuts
1/3 cup lightly packed brown sugar
1 1/2 cups flour (I use 1 cup all purpose & 1/2 cup wheat)
2 tsp. baking powder
1 tsp. cinnamon
1/4 tsp. salt

Additional ingredients
1/4 cup oil
1/4 cup applesauce (or you can substitute an additional 1/4 cup oil)
1/2 cup water
2 eggs

1. In a 1-quart glass jar, layer the sugar, oats, raisins, coconut, wheat germ, nuts, and brown sugar, packing well between each layer.  Then in a small bowl combine flour, baking powder, cinnamon, and salt, and add this to the jar.  Press down to fit. Cover and store in a cool dry place.  Yield: 12 muffins

2. To prepare muffins- Empty jar into a large mixing bowl, blend dry ingredients thoroughly.  Add oil, applesauce, water and eggs, and mix until just blended.  Fill 12 standard size muffin cups (use liners or nonstick spray).  Bake at 350º for 21 minutes.  Cool on wire rack.

* I get wheat germ at any store with a bulk food section.  Here is an article that lists other substitutes for wheat germ, if you don't have (or can't find) it.


Why I love it? Well I like the fact that it fits in a jar, and it's a pretty tasty muffin.  It has a lot of different flavors & textures.  Plus, it's much healthier than muffins you can buy!  I actually feel good about feeding this to my kids for breakfast.

Thursday, May 24, 2012

Peanut Butter Banana Oatmeal Squares

(I'm sorry about the serious lack of posting lately- I've been so busy with various activities, and finishing up the year homeschooling.  I have been making a lot of new recipes lately & taking tons of pictures, so I'll have plenty to post about once I find the time!  Just 2 weeks left of school, then I'll be back.)

I saw this recipe on Pinterest, and right away it looked interesting.  I'm always up for an easy, yummy breakfast recipe!  The kids and I love these- even my picky eater who refuses to eat a bowl of oatmeal, he'll eat this because it's in bar form!  Silly boy.  These bars will last a few days at room temperature, and if you want you can reheat them before eating.  Enjoy!

Peanut Butter Banana Oatmeal Squares
Printable version here

1 1/2 cups oats (old fashioned or quick)
1/4 cup packed light brown sugar
1 tsp. baking powder
1/2 tsp. kosher salt (or 1/4 tsp. table salt)
1 tsp. ground cinnamon
1 tsp. vanilla extract
1/2 cup milk
1 large egg, lightly beaten
1 large banana, mashed
1/4 cup creamy peanut butter

1. Mix together the oats, brown sugar (I used a little less than 1/4 cup), baking powder, salt, and cinnamon.

2. Add in the vanilla, milk, and egg.  Mix the ingredients together.  Then add in the mashed banana and peanut butter and stir to combine.

3. Pour the mixture into a lightly greased 8x8 inch baking pan.  Bake at 350º for 20 minutes.  Cool, cut into squares, and enjoy!

Recipe source: gingerbreadbagels.com

Why I love it?  They are ingredients I almost always have (normally I just have to wait for a ripe banana), they have a good amount of nutrition in them (fiber, protein, and some good fats), they're easy, and they taste great! 

Wednesday, November 2, 2011

Oatmeal Pancake Mix

This recipe has the potential to change breakfast time around here- it is the fastest warm, homemade breakfast I think I've ever made! I found this on a blog (here), and have made it several times this week.

What you do is make a dry pancake mix, then when you want to make the pancakes, mix together one cup of the mix with a cup of buttermilk and one egg. That's it! Cook on a griddle, and you have a healthy breakfast that everyone will eat!


Oatmeal Pancake Mix
Printable version here

* Makes 10 cups of dry mix

3 1/2 cups quick oats
5 cups whole wheat flour (or half wheat, half white)
3 tbsp. sugar
3 tbsp. baking powder
1 tbsp. salt
1 tbsp. baking soda
1 cup vegetable oil

1. Grind the oats in a blender (what I used) or a food processor until powdery. Place oats and all dry ingredients in a mixer or large bowl, and stir to combine.

2. With mixer on slow speed (or gently by hand), drizzle the vegetable oil into the bowl slowly while the mixer is running. When all the oil has been added, stop the mixer and squeeze a clump of mix into your hand. If it stays together, it is just right. If it is still crumbly, add another tablespoon of oil at a time until the consistency is correct (you probably won't have to do this).

Storage info: Store in an airtight container for up to two weeks at room temperature or indefinitely in the refrigerator or freezer. Feel free to make a half batch if you'd like- that's what I did the first time.

Cooking info: Whisk together 1 cup of mix, 1 cup buttermilk (or half plain yogurt and half milk), and 1 egg. Heat a griddle and drop the batter onto it. Cook on both sides until done. This much makes about 10 to 12 3-inch pancakes.

Why I love it? I always have these ingredients, it is SO EASY to keep this on hand and mix up a batch, and the kids and I love them! They're so much healthier than regular white pancakes- they're whole grain and have fiber, but they still taste every bit as good!

Monday, October 10, 2011

Buttermilk Blueberry Coffee Cake

The other day I was trying to find a use for my buttermilk before it went bad, and I found this recipe by searching allrecipes.com. It had great reviews, and it did not disappoint! I reduced the amount of sugar a little bit. I will definitely make this one again- maybe even tomorrow!


Buttermilk Blueberry Coffee Cake
Printable version here

1/4 cup butter, softened
1/2 cup white sugar
1 egg
1/2 tsp. vanilla extract
2 cups all-purpose flour
1 1/2 tsp. baking powder
1/2 tsp. baking soda
1/2 tsp. salt
1 cup buttermilk
1 cup blueberries (fresh or frozen)

Topping
1/4 cup all-purpose flour
1/4 cup white sugar
2 to 3 tbsp. butter

1. Preheat oven to 350º. Grease and flour an 8x8 inch pan (or a 9-inch round pan); set aside.

2. In a large bowl, cream together 1/4 cup butter and 1/2 cup sugar until light and fluffy. Beat in the egg, followed by the vanilla.

3. Stir together the flour, baking powder, baking soda, and salt. Beat in the flour mixture alternately with the buttermilk, mixing just until incorporated. Stir in blueberries. Pour batter into prepared pan.

4. In a small bowl (or food processor), combine remaining flour and sugar. Cut in butter until mixture resembles coarse crumbs. Sprinkle on top of batter.

5. Bake for 55 minutes, or until a toothpick inserted into the center of the cake comes out clean. Set pan on a wire rack to cool. Covered with plastic wrap, this stays fresh for several days. Reheat leftovers if desired.

Why I love it? It's fairly easy, and I normally have the ingredients on-hand. The kids and I all loved it (except for my picky eater, who said it wasn't good, even though he didn't even try a bite!). It's not too bad health-wise, for a breakfast cake! It's just soft, tasty, and I like the slight tang from the buttermilk.

Saturday, June 4, 2011

Blueberry-Almond Oat Muffins

I found this recipe online recently; it's originally from Pampered Chef. I made it for breakfast this morning with just a few changes. They turned out great!

(These muffins are on my "new" china. My mom just passed down the set that she & my dad got for their wedding. I love it!!)


Blueberry-Almond Oat Muffins
Printable version here

1 1/2 cups all purpose flour
1 cup quick oats
1/2 cup packed brown sugar
1 tbsp. baking powder
1/4 tsp. salt
1 cup blueberries (fresh or frozen)
1 cup milk
1/4 cup butter or margarine, melted
1 egg
1/2 tsp. almond extract
1/4 cup sliced almonds

1. Spray 12-cup muffin tin with nonstick cooking spray (or use paper liners). Preheat oven to 425º.

2. Combine dry ingredients in a large mixing bowl; mix well. Stir in blueberries. In a small bowl, whisk together the milk, butter, egg, and extract. Pour into the dry ingredients & mix just until dry ingredients are moistened.

3. Scoop batter evenly into muffin cups (about 1 rounded large scoop). Put sliced almonds in a small plastic bag, and crush with your hand to break up the pieces a little. Sprinkle over batter, then press down gently. Bake 18 minutes or until golden brown. Remove to a cooling rack; when cool enough to handle, remove from pan & place on rack. Serve warm.

Yield: 12 muffins.

Why I love it? The almonds on top, and the browned exterior, give the muffin a nice crunch, while the inside is soft & fluffy. The oats & blueberries make them a little heartier, but they're still light. They're not too unhealthy for a muffin, either!

Tip- a new product I've been using, and like, is called Baker's Joy. It's a nonstick spray with flour in it. I use it now any time I'm making a cake-type thing. That's what I used for these muffins. It releases the food so easily! I've seen it at most grocery stores, near the Pam.

Wednesday, April 13, 2011

Breakfast Burritos


Someone shared this recipe on a message board recently, and it caught my eye. Dave gets up & leaves for work while the rest of us are still sleeping, so I like having something easy for him to make for breakfast. This recipe makes about 20 burritos. It really wasn't much work to make them, and they're pretty tasty.


Breakfast Burritos
Printable version here

1 lb. sausage (I used a 12 oz. package)
12 eggs, beaten together
1 cup salsa (I used taco sauce)
2 cups shredded cheese
20 medium tortillas

1. Brown the sausage, drain, and set aside.

2. In the same pan, add the eggs and scramble. When cooked through, mix with cooked sausage & the salsa.

3. Add about 1/4 cup of this mixture to each tortilla, then top with shredded cheese. Fold into burritos.

4. Flash freeze (set them on a cookie sheet or baking pan, leaving a little space in between, so they don't stick together), then place in a Ziploc bag or two.

To serve: Cover each burrito with a paper towel, microwave until hot, about 1 1/2 minutes.

Why I love it? Mainly, I love the convenience of these. It's so nice being able to pull these out of the freezer for breakfast (or anytime!). They didn't take long to make, especially considering how many I made.

Wednesday, March 30, 2011

Blueberry Bran Muffins

I got this recipe from an Albertson's coupon/recipe booklet. I made just a few changes, and really like it! It's healthy & yummy. I made these last week, but am just now getting to posting it, since one of my kids stuck the recipe under the oven! I saw a little paper peeking out, and sure enough it was the recipe. :)


Blueberry Bran Muffins
Printable recipe here

Yield: 12 muffins

Dry Ingredients
1 1/2 cups flour (I used half all-purpose & half whole wheat)
1 cup bran flakes cereal*, crunched up a little
1 tbsp. baking powder
1/4 tsp. baking soda
1/4 tsp. salt
1/2 tsp. cinnamon, optional

Wet Ingredients
1/2 cup low-fat vanilla yogurt
1/2 tsp. vanilla
1/2 cup honey
2 eggs
1/4 cup oil

1 cup blueberries (fresh, or frozen ones that have been thawed, rinsed, and patted dry)

1. In a medium bowl, combine the dry ingredients; set aside.

2. in a large mixing bowl, whisk together the wet ingredients. Add the flour mixture and mix until just combined, do not over mix. Fold in blueberries.

3. Divide batter into 12 lined or greased muffin cups. (Cups will be about 3/4 full) Bake in a preheated 350º oven for 23 minutes or until toothpick inserted in center comes out clean. Store in an airtight container. Refrigerate or freeze any that won't be eaten within about 3 days.

* I bought plain bran flakes from the bulk section at WinCo, but you could also use Raisin Bran, and pick the raisins out.

Why I love it? It uses ingredients that are easy to keep on hand, it's easy to make, healthy, and makes a good breakfast or snack for me & the kids.

Wednesday, March 23, 2011

Buttermilk Waffles

I don't often make waffles, because it's so much faster to toast one from the freezer. Lately though, I've started making them a little more. Like most homemade foods, they're cheaper, yummier, and healthier than packaged foods- the only downside is the time they take. The kids like to watch TV when they first wake up, so that gives me some time to get breakfast ready.

I've been using this recipe for a few years. I found it on a blog, and they had adapted it from Cook's Illustrated (no wonder why it's so yummy!). The only ingredient I need to make sure I have is buttermilk, and the rest are things I always have.

The kids and I love these waffles. The outsides are so nicely browned & crisp, and the insides are so soft! The buttermilk gives them great flavor. If you're willing to make a little mess of your kitchen, I know you'll appreciate these waffles. :)


Buttermilk Waffles
Printable version here

1 cup all-purpose flour
1 tbsp. cornmeal
1/4 tsp. salt
1/4 tsp. baking soda
1 egg, separated
1 cup buttermilk
2 tbsp. butter, melted and cooled
Nonstick cooking spray

1. Start preheating your waffle iron. In a mixing bowl, whisk together the flour, cornmeal, salt, and baking soda. In another mixing bowl, whisk the egg yolk with buttermilk and melted butter until combined.

2. Clean your whisk and beat the egg white to soft peaks. (I use my handheld mixer with whisk attachment for this part)

3. Slowly add the liquid ingredients into the dry ingredients, folding together (the batter will be quite thick). Then add the egg whites and gently fold them into the batter.

4. Spray your waffle iron with some nonstick spray and spread the batter onto the iron. Cook until the waffles are golden brown, about 2 - 5 minutes depending on your machine instructions. (Mine take 3 1/2 minutes) Yield: 4-6 waffles (I double the recipe and get 10)

Freezer: For freezer toaster waffles, leave the waffles golden and slightly underdone,
cool them on a wire rack, wrap them in plastic wrap and freeze. They can be frozen then popped into the toaster for a quick breakfast.

Why I love them? As I wrote above, I love the texture of these- both soft & crispy. Eggo waffles just can't do that!

Tuesday, March 15, 2011

Chewy Oatmeal Bars

Sorry I'm getting a little behind on posting recipes... we've had a trip to Great Wolf Lodge, 3 busy kids, stuff like that... Plus, I've been making a lot of Cook's Illustrated recipes lately- they're delicious, but copyrighted. I've been plenty busy in the kitchen lately!

So, here's a simple oatmeal bar recipe. They're kind of like granola bars, but softer & fluffier.


Chewy Oatmeal Bars
Printable version here

1/4 cup brown sugar, packed
1/4 cup white sugar
4 ounces vanilla (or plain) yogurt
1 large egg white, beaten lightly
1 tbsp. vegetable oil
1 tbsp. milk
1 tsp. vanilla
3/4 cup flour
1/2 tsp. baking soda
1/2 tsp. cinnamon
1/2 tsp. salt
1 1/2 cup oats (I use old fashioned)
1/2 cup raisins (or other dried fruit)

1. Mix together sugars, yogurt, egg white, oil, milk and vanilla.

2. Sift together dry ingredients and add to mixture.

3. Stir in oats and raisins.

4. Spread dough onto an ungreased 8x8 inch pan.

5. Bake at 350º for 25 minutes or until lightly browned. Yield: 16 bars.

(I normally skip the cinnamon, and make these with dried cranberries & chocolate chips- our family's favorite combination!)

Why I love these? They're an easy, healthy snack. One batch of these lasts us for a few days. I also like that I usually have these ingredients in the kitchen. Although, one thing you can learn from me- these really are best using vanilla or plain yogurt. All I had on hand last week was flavored yogurt, so I made it with peach- and they tasted a little funny. :) Chocolate & cranberry with a hint of peach... next time I'll stick to vanilla!

(Based on this recipe)

Thursday, February 24, 2011

Lemon Poppy Seed Muffins


Mmm, just looking at this picture makes my mouth water... I made these muffins today for the first time, and they were fabulous!! I'm not surprised, they're from my Cook's Illustrated cook book that I love. The book gives several more variations for this recipe (apricot-almond, cranberry-orange, etc.). Here's my *tiny bit* healthier version of the recipe from the book.

Lemon Poppy Seed Muffins
Printable version here

2 cups (10 oz.) all-purpose flour
1 cup (5 oz.) whole wheat flour
1 tbsp. baking powder
1/2 tsp. baking soda
1/2 tsp. salt
2 tbsp. poppy seeds
1 tbsp. grated lemon zest (from 1 large, or 2 small lemons)
10 tbsp. (1 1/4 sticks) unsalted butter, softened
6 oz. sugar (little under 1 cup)
2 large eggs
1 1/2 cups plain whole milk yogurt*

1. Prepare a 12-cup muffin tin by either spraying it with nonstick spray or putting cupcake liners in it. Whisk the flour, baking powder, baking soda, salt, poppy seeds, and lemon zest together in a medium bowl. Set aside.

2. Using an electric (or stand) mixer, beat the butter & sugar together at medium-high speed until light and fluffy, about 2 minutes. Add the eggs, 1 at a time, beating well after each addition.

3. Reduce the mixer speed to medium-low and beat in half of the flour mixture, followed by 1/2 cup of the yogurt. Beat in half of the remaining flour mixture, another 1/2 cup of yogurt, then repeat one more time. Portion the batter evenly into the prepared muffin tin. (The tins will be filled pretty much to the top.)

4. Bake the muffins in a 375º oven for 25 minutes, or until light golden brown. (Rotate pan halfway through to help ensure even baking.) Let the muffins cool for a few minutes in the pan before removing to a wire rack. Delicious served warm, or store leftovers in an airtight container.

Make-ahead directions: After filling muffin tin, you may wrap the muffin tin tightly with plastic wrap sprayed with nonstick spray and either refrigerate for 24 hours or freeze for up to 1 month. If made without cupcake liners, you can remove the frozen batter balls from the pan once frozen, and store in a ziploc bag. To bake, unwrap the muffins and bake for 25-30 minutes if refrigerated, or 35-40 minutes if frozen.

Tip: Eggs are best creamed into butter & sugar when they are at room temperature. You can either set them on the counter before starting the recipe, or what I normally do, is put the whole eggs in a bowl of warm water while you're working on the beginning parts of the recipe. By the time you need them, they'll be a good temperature.

Why I love it? They're light, fluffy, and soft, with a slightly crisp top. They smell & taste amazing! :) Plus, the make-ahead directions can come in very handy.

*Yogurt- the book mentions that you can also use low-fat or nonfat yogurt, but I wanted to get exactly what they called for (since it was my first time making it). This is the kind I found at Albertson's:

Monday, February 14, 2011

Buttermilk Pancakes (2)

I made a new pancake recipe this morning for the kids, and I really liked them. Their pancakes were heart-shaped in honor of Valentine's Day.


Buttermilk Pancakes

3 tbsp. unsalted butter, melted & cooled slightly
9 oz. (2 cups) unbleached all-purpose flour (I used 1 c. each all-purpose & whole wheat)
1/4 cup sugar
2 1/2 tsp. baking powder
1/2 tsp. baking soda
1/2 tsp. kosher salt (or 1/4 tsp. table salt)
2 cups buttermilk
2 large eggs

1. In a large bowl, whisk the flour, sugar, baking powder, baking soda, and salt. In a medium bowl, whisk the buttermilk and eggs. Pour the wet ingredients into the dry ingredients. Whisk gently until the dry ingredients are almost incorporated; stop before the batter is evenly moistened.

2. Add the melted butter and mix just until the batter is evenly moistened (there will be small lumps still). Let the batter rest while you heat the griddle.

3. Heat a griddle or large skillet over medium heat (or set electric griddle to 375º) until drops of water briefly dance on the surface before evaporating. Lightly oil the griddle.

4. Working in batches, pour 1/4 cup of the batter onto the griddle for each pancake. Let cook until bubbles rise to the surface & the edges look dry. Check the underside of the pancake to make sure it's nicely browned, then flip. Cook until the 2nd side is nicely browned, too.

*If desired, you can transfer the cooked pancakes to a baking sheet and keep warm in a 200º oven while you finish making the pancakes. Cooked pancakes will keep for up to 2 days in the refrigerator and up to 1 month in the freezer. Reheat in the microwave, or defrost overnight in the fridge, and reheat in a 350º oven for 5 minutes.

Why I love it? Well, my 6 year old just told me this as I was typing... "Thank you, I love these pancakes! They're my favorite type ever!" (as he was helping himself to pancake #3 and 4). They're healthy, delicious, and use ingredients I normally have on-hand.