Thursday, September 30, 2010

Crockpot Beef & Gravy

I've had a very busy past week, including a trip to Moses Lake and a night stuck in a hotel in Cle Elum because our car's brakes stopped working. Yikes! But we're back now, and *almost* recovered from the trip. So, back to posting I go. Here's a recipe I got from my mom years ago. We had it for dinner last week.


Crockpot Beef & Gravy

1 1/2 lbs beef stew meat, trimmed of fat
1 can cream of mushroom soup
1 can French onion soup


Combine the two soups in a crockpot. Add meat, and stir until meat is covered by the sauce. Cook on low for 8 hours or high for 4 hours. Serve; add salt & pepper to taste.

Why I love it? Crockpot + 3 ingredients! What could be better? :) The meat tastes great, the sauce is good, and my whole family enjoys it. I served it with mashed red potatoes.


Thursday, September 23, 2010

Chocolate Trifle


This is one of my ABSOLUTE favorite desserts to make, especially for a crowd. I've made several variations of it, too. You cannot go wrong with this!

Chocolate Trifle
Printable version here

1 (19.8 oz.) package brownie mix (plus ingredients listed on the box), or homemade brownies baked in a 9x13 pan
1 small package instant chocolate pudding mix
1/2 cup water
1 (14 oz.) can sweetened condensed milk
16 oz. container Cool Whip, thawed*
Grated chocolate for garnish, optional

1. Prepare brownie mix according to package directions and cool completely. Cut into 1 inch squares.

2. In a large bowl, combine sweetened condensed milk and 1/2 cup water, then stir in pudding mix. Mix until smooth, then fold in half the container of Cool Whip until no streaks remain.

3. In a trifle bowl or glass serving dish, place half of the brownies, half of the pudding mixture and half of the remaining Cool Whip. Repeat layers. Shave chocolate onto the top layer for garnish, if desired. Refrigerate 8 hours before serving. Serves 12.

Recipe Source: http://allrecipes.com/Recipe/Chocolate-Trifle/Detail.aspx

* The original recipe calls for 20 ounces of Cool Whip, but I have found one 16 ounce carton to be enough.

Why I love it? It's easy to make, it can be made beforehand, it easily serves a lot of people, it looks impressive, and it tastes fantastic!! Plus, if there are any leftovers, they taste good for several days. If they last that long ;) I make it in my Pampered Chef trifle bowl, and that fits perfectly.

Sunday, September 19, 2010

Yogurt Berry Smoothie

A few months ago, I noticed this new product in the freezer section. Surely, I could make it at home for cheaper! :) So, here's what I did.

I froze a 6-ounce container of strawberry yogurt. It made 7 cubes (not quite full to the top). I looked online and found that the Yoplait ones use a 7.6 ounce bag of frozen yogurt & fruit, so I measured mine to be close to that. The smoothie ended up using 5 yogurt cubes & 4 large frozen strawberries.

Add to a blender with 1 cup of milk (I used skim milk), and blend until smooth

It made the perfect amount for me & two kids!

I've made these many times now, with different flavors of yogurt, different fruit, etc. The basic directions are the same:

Yogurt Smoothie (Serves 2)
Printable version here

1. Freeze yogurt in ice cube tray; freeze fruit.

2. In a blender, combine 5 yogurt cubes, frozen fruit (approx. 1/3 cup), and 1 cup milk. Blend until smooth.

Why I love it?
They were great!! It had a good consistency (thick, but still drinkable through a straw), and a good balance of yogurt & fruit taste. By freezing the yogurt beforehand, it's so easy to make- just put in the frozen ingredients and milk, and voila! Easy snack or breakfast!

Sunday, September 12, 2010

Roasted Tomato Soup


The first time I made this soup, I was amazed at how different it was from canned tomato soup.  I shouldn't have been surprised, because homemade is always better- but I was shocked at how good it was!  It tastes creamy, flavorful, and just real! Like what canned soup is trying to imitate!  Even though I don't like tomatoes (or even ketchup), I love this.

I served this with homemade multigrain bread.  I found the recipe from Our Best Bites, here.  It was the perfect complement to this soup!

Roasted Tomato Soup
Printable version here

6 cups (3 pints) cherry tomatoes
3 T. olive oil, divided
1 t. salt
1/2 t. pepper
2 T. unsalted butter
2 garlic cloves, minced
1 c. chopped onion
1 (28 oz.) can diced tomatoes, undrained
4 cups chicken broth
1/2 t. thyme
1 cup whipping cream (I use whole milk)

1. Heat the oven to 400º. On a baking sheet, combine the tomatoes, 2 T. oil, salt & pepper. Toss the ingredients to coat evenly and spread them in a single layer. Roast the tomatoes until they are shriveled with brown spots, about 35 to 45 minutes.

2. In a large pot, heat the butter and remaining tablespoon of oil over medium heat. Add the garlic and onion and saute until softened, about 6 minutes. Add the canned tomatoes with their juice, the broth, the thyme, and the roasted tomatoes, including any liquid on the baking sheet. Bring the mixture to a boil, then reduce the heat and simmer, partially covered, for 40 minutes.

3. Using a blender or immersion blender, puree the soup until it's smooth. (You will need to do this in batches, and you might want to cool the soup a little before pureeing it) Return it to the pot and stir in the cream. Without letting the soup boil, warm over medium heat, stirring often, until steaming. Add salt & pepper if necessary, and add a little sugar if it's too tart. Makes about 10 cups.

Recipe source: Family Fun magazine

* Last time I made this, I only made a half batch (to save money on ingredients). It made enough to feed my family of 2 adults & 2 kids, plus 1 bowl leftover. I used my immersion blender to puree it, being very careful not to splash myself with hot soup.

Why I love it? It's the best tomato soup I've ever had!! It had a more appealing feel than canned tomato soup- there was a little texture to it, and it just tasted real, like actual tomato soup! :) It's also a great way to use up tomatoes if you have a bunch of them. Plus, tomatoes are high in vitamin C! I've also served this with a yummy sourdough grilled cheese. Those 2 things combined tasted like they were from a restaurant!

Thursday, September 9, 2010

Layered Raspberry Dessert


I made this dessert for Labor Day, and it was a hit! The recipe comes from a friend at church, Kristen Peterson.

Layered Raspberry Dessert
Printable version here

1 cup flour
½ cup butter or margarine, softened
2 T sugar
8 oz. cream cheese, softened
1 cup powdered sugar
1 cup Cool Whip, thawed, plus more for serving
3 cups fresh or frozen raspberries
¼ cup cornstarch
1 ½ cups sugar (or ¾ cup Baking Splenda)
1 large pkg. raspberry Jello

1. Crust layer: Mix flour, butter, and 2 T. sugar with a pastry blender; spread into 9x13" pan. Press flat with your hands. Bake at 350º for 20 min. Let cool.

2. Cream cheese layer: Beat cream cheese, powdered sugar, and Cool Whip until smooth. Spread over cooled crust.

3.Sprinkle raspberries evenly over cream cheese layer.

4. Berry layer: In a medium saucepan, stir 3 cups water, cornstarch and sugar together. Cook until thick and clear, whisking often. Remove from heat. Add Jello and mix. Allow to cool for 10-15 min, stirring occasionally. Pour liquid over raspberries. Chill until firm.

Why I love it? It has a good balance of richness (the buttery crust and the creamy middle layer) and fruity-ness , it's refreshing, and it can be made in advance. Requires no prep time when you're serving it, just cut into squares, and add a dollop of Cool Whip if you'd like. I also loved the creamy layer- it seems like that would also make a good fruit dip. The gelatin part was fun to make, too. Mmm! :)

Tuesday, September 7, 2010

Buttermilk Sandwich Bread

I might as well start off this blog with the recipe for the picture (that used to be) at the top of my blog . I've only made it once, but need to again very soon! It's called Buttermilk Sandwich Bread, and it's from this awesome cookbook:
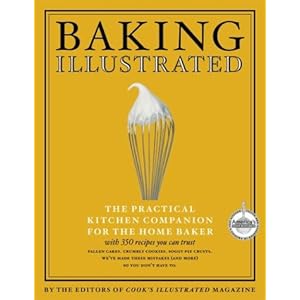


It's only $23 on Amazon- I'd add it to your Christmas list if you don't already have it! :)

Buttermilk Sandwich Bread
Printable version here

3 3/4 cups (18.5 oz.) unbleached all-purpose flour, plus more for dusting the work surface
2 teaspoons salt
1 cup cold buttermilk (can use 1 cup of milk with 1 tbsp lemon juice as a substitute, mix milk and lemon juice and let it set for about 10 min. prior to using)
1/3 cup boiling water
2 tablespoons unsalted butter, melted
3 tablespoons honey (2.2 oz.)
1 envelope instant yeast (about 2 1/4 teaspoons)

1. Adjust oven rack to lowest position and heat oven to 200 degrees. Once the oven temperature reaches 200 degrees, maintain the heat for 10 minutes, then turn off the oven.

2. Mix 3 1/2 cups of the flour (17.5 oz.) and the salt in the bowl of a standing mixer fitted with the dough hook. Mix the milk, water, butter, honey, and yeast in a 4-cup liquid measuring cup. Turn the machine to low and slowly add the liquid. When the dough comes together, increase the speed to medium and mix until the dough is smooth and satiny, stopping the machine two or three times to scrape dough from the hook, if necessary, about 10 min. (After 5 minutes of kneading, if the dough is still sticking to the sides of the bowl, add flour, 1 tablespoon at a time and up to 1/4 cup total, until the dough is no longer sticky.) Turn the dough onto a lightly floured work surface; knead to form a smooth, round ball, about 15 seconds. (Don't be alarmed if this makes your mixer go nuts!! LOL)

3. Place dough in very lightly oiled large bowl, rubbing the dough around the bowl to coat lightly. Cover the bowl with a damp cloth and place it in the warmed oven until the dough doubles in size, 50 to 60 minutes. (This picture is before rising)


4. Gently press the dough into a rectangle 1 inch thick and no longer than 9 inches. With a long side facing you, roll the dough firmly into a cylinder, pressing with your fingers to make sure the dough sticks to itself. Turn the dough seam-side up and pinch it closed. Place the dough seam-side down in a greased 9 by 5-inch loaf pan and press it gently so it touches all four sides of the pan. Cover with damp cloth; set aside in warm spot until the dough almost doubles in size 20-30 min. (Picture is after rising)


5. Keep one oven rack at the lowest position and place the other at the middle position and heat the oven to 350 degrees. Place an empty baking pan on the bottom rack. Bring 2 cups of water to a boil in a small saucepan. Pour boiling water into the empty pan on the bottom rack and set the loaf onto the middle rack. Bake until an instant-read thermometer inserted at an angle from the short end just above the pan rim into the center of the loaf reads 195 degrees, 40 to 50 minutes (mine took 42 minutes). Remove bread from the pan, transfer to wire rack, and cool to room temperature. Slice and serve.


*If you'd like, you can substitute wheat flour for part of the white flour. I do about 2:1 regular to wheat flour.

Why I love it? For one, the smell while it's baking is amazing!! I think they should make candles in this scent! The bread tastes fantastic, it's inexpensive, and I like that I know exactly what's in it. Simple ingredients, nothing funny. It does take a bit of time to make, but most of it is hands-off. I timed myself tonight as I made another loaf, and start to finish it took 3 hours. That was with distractions- I'm sure it could be made a little faster in a quiet kitchen. :)

Welcome to my new blog!

I have run out of ideas to post on my other blog (dueonchristmas.blogspot.com), so I came up with a new idea the other day. I LOVE cooking and trying new recipes, and since cooking is something I do every day, I will always have new stuff to write about on here. Most of the recipes I post will be ones I found somewhere else (like a cookbook or a website), but some of them will be ones I made up. I'm so excited to get this started! For now, I better go work on our homeschooling. I'll start adding recipes soon!

Thanks for stopping by! :)