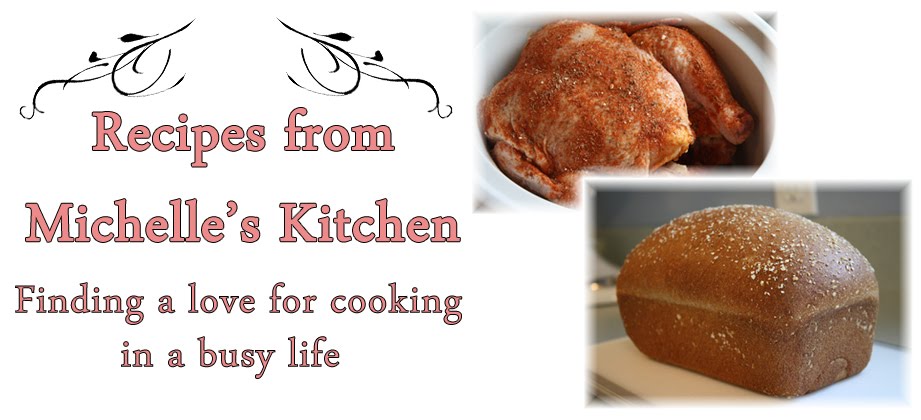
It's been just over a year since I started this blog. It seemed like a good idea when I started it, and I have enjoyed it even more than I expected! Since the blog just keeps getting bigger, I knew that it needed some new organization. My lovely husband helped me create the new tabs at the top. My favorite part is the Recipe Index- old posts are so much easier to find now!
Thanks to everyone who reads this blog, and to those who comment. I really enjoy sharing recipes with you, and it gives me good motivation to keep cooking! :)
Feel free to mention any other suggestions you have for the blog. I want to make it as user-friendly as possible!
 |
 |
 |
 |
 |
Tuesday, October 25, 2011
Friday, October 21, 2011
Crockpot Roasted Chicken
Growing up, my definition of chicken was boneless, skinless chicken breasts. They're cheap, healthy, and easy to use. In the past year or so I've tried out recipes using other cuts of chicken, too, and have found that there are advantages to them as well.
One of these is a whole chicken. I stocked up recently when they were on sale for 79 cents/lb, making a whole chicken about $3.50. For that price I can get two dinner's worth of meat, plus a few quarts of broth.
I found this recipe on a website called www.100daysofrealfood.com. (They have tons of good, wholesome recipes) It is such an easy way to cook a whole chicken. When I make it, I use half of the meat that night, and half for another dinner. The possibilities for the cooked chicken are endless- you can eat it as-is (just cut into pieces and serve with sides), in soups, casseroles, chicken salad, etc.
Here's the gist of the recipe:
Make a spice rub

Put sliced onions in the bottom of the crockpot, place chicken in, cover with rub

Put lid on, cook on high for 4 hours, and it's done!

Does it get much easier than that?? I use a strong wooden spoon to get the chicken out- I put it in the cavity of the chicken, hold it upright to drain the liquid, then transfer it to a baking sheet (so it could cool a little, and the juices won't run all over). Then I peel the skin off, and cut it up however I'd like. I then make chicken stock with the leftover ingredients- the link above gives directions for that.
Crockpot Roasted Chicken
Printable version here
2 teaspoons paprika
1 teaspoon salt
1 teaspoon onion powder
1 teaspoon thyme
½ teaspoon garlic powder
¼ teaspoon cayenne (red) pepper
¼ teaspoon black pepper
1 onion
1 large chicken
1. Combine the dried spices in a small bowl.
2. Loosely chop the onion and place it in the bottom of the slow cooker. Remove any giblets from the chicken and then rub the spice mixture all over. You can even put some of the spices inside the cavity and under the skin covering the breasts. Put prepared chicken on top of the onions in the slow cooker, cover it, and turn it on to high. (Or, you can put the chicken in the crockpot, then cover with the spice mix) There is no need to add any liquid.
3. Cook on high for 4 – 5 hours (for a 3 or 4 pound chicken) or until the chicken is falling off the bone. (My chicken was about 3 pounds and was perfect in 4 hours) Enjoy!
Why I love it? It is very easy- really! I was scared of cooking with whole chickens before finding this recipe. Now, I stock up when I find them on sale, just so I can make this. Like I said, I get two dinner's worth of cooked chicken plus a good amount of stock out of this. It would also be a good recipe to make in the summer when you want shredded chicken, but don't want to turn on the oven.
Tuesday, October 18, 2011
Blog Recommendation
There are so many cooking blogs out there now, but it's kind of hard to find them- it's not like there's a master list of blogs. So, when I stumble across a good one, it's pretty exciting!
I found one a few months ago that I love. The things she posts are, for the most part, the same type of foods that I like to make. She's a mom of 4 little boys, and she likes to cook from scratch. She's also a fan of Cook's Illustrated recipes, like me! The recipes I've tried from there have all been great, and there's such a good selection.
So, go check out her blog, I'm sure you'll like it!
Delicious Ham & Potato Soup
Recently I searched allrecipes.com for a new ham & potato soup recipe, as I didn't have one that I loved. The one I found had a 5 star rating with over 5300 reviews- so I figured it had to be good! It was! I've made it twice in the past week (since we loved it and I still had most of the ingredients on hand).
Including chopping the vegetables, it takes about 45 minutes to make. It serves about 6, and the leftovers are good, too. Basically, you cook the ham & vegetables in a pot of water, and in a separate pot you make a creamy milk sauce. Mix the two together and you're done!


(Original recipe from here)
Delicious Ham and Potato Soup
Printable version here
3 1/2 cups diced potatoes (peeled if desired)
1/2 cup diced celery
1/3 cup finely chopped onion
1 cup diced cooked ham
3 cups water
1 tbsp. chicken bouillon
1/2 tsp. each salt & pepper, or to taste
3 tbsp. butter
3 tbsp. flour
2 cups milk, warmed
1. Combine the potatoes, celery, onion, ham, water, bouillon, salt and pepper in a large pot. Bring to a gentle boil, then simmer for 10-15 minutes or until potatoes are tender.
2. Once you turn on the pot to boil, start making the sauce in a separate saucepan. Melt butter over medium-low heat, then whisk in the flour. Cook, stirring constantly, for about 1 minute. Slowly whisk in the milk. Bring it to a simmer, stirring often, then cook for a few more minutes until thickened.
3. Stir the milk mixture into the potato mixture, season to taste, and serve. Top with grated cheese, if desired. Enjoy!
Notes
- Feel free to add more or less of the vegetables; this is just the amount I like
- You could substitute the water & bouillon for chicken broth
- I slightly peel the potatoes, just while I'm cutting them. I slice off the ends and part of the flat surface, which leaves us with about half the peel still attached.
Why I love it? It's relatively quick to make, easy (and doesn't require any specialized kitchen equipment- just a cutting board, knife, and 2 pots!), inexpensive, pretty healthy (the thickened milk is a lot healthier than adding cream), and it's just delicious! It's so creamy, and all the tastes are perfectly balanced. I wouldn't mind making this over & over all winter!
Monday, October 10, 2011
Buttermilk Blueberry Coffee Cake
The other day I was trying to find a use for my buttermilk before it went bad, and I found this recipe by searching allrecipes.com. It had great reviews, and it did not disappoint! I reduced the amount of sugar a little bit. I will definitely make this one again- maybe even tomorrow!


Buttermilk Blueberry Coffee Cake
Printable version here
1/4 cup butter, softened
1/2 cup white sugar
1 egg
1/2 tsp. vanilla extract
2 cups all-purpose flour
1 1/2 tsp. baking powder
1/2 tsp. baking soda
1/2 tsp. salt
1 cup buttermilk
1 cup blueberries (fresh or frozen)
Topping
1/4 cup all-purpose flour
1/4 cup white sugar
2 to 3 tbsp. butter
1. Preheat oven to 350º. Grease and flour an 8x8 inch pan (or a 9-inch round pan); set aside.
2. In a large bowl, cream together 1/4 cup butter and 1/2 cup sugar until light and fluffy. Beat in the egg, followed by the vanilla.
3. Stir together the flour, baking powder, baking soda, and salt. Beat in the flour mixture alternately with the buttermilk, mixing just until incorporated. Stir in blueberries. Pour batter into prepared pan.
4. In a small bowl (or food processor), combine remaining flour and sugar. Cut in butter until mixture resembles coarse crumbs. Sprinkle on top of batter.
5. Bake for 55 minutes, or until a toothpick inserted into the center of the cake comes out clean. Set pan on a wire rack to cool. Covered with plastic wrap, this stays fresh for several days. Reheat leftovers if desired.
Why I love it? It's fairly easy, and I normally have the ingredients on-hand. The kids and I all loved it (except for my picky eater, who said it wasn't good, even though he didn't even try a bite!). It's not too bad health-wise, for a breakfast cake! It's just soft, tasty, and I like the slight tang from the buttermilk.
Wednesday, October 5, 2011
White Chocolate Sauce (& Mocha)
Recently I started using my espresso machine again, after not for a few years. My days with homeschooling the 3 kids are long and often challenging, so if I want to reward myself with a coffee drink to start the day, I think that's fine. :)
I found this recipe online- it only takes 3 ingredients, and about 3 minutes! (Hey, and about $3!) Nutrition-wise, well, it's not great, but it is a treat! I promise you'll like this one.
Added the white chocolate chips to heated sweetened condensed milk

The finished sauce- it's pretty thick

White Chocolate Sauce
Printable version here
1 can (14 oz.) sweetened condensed milk
12 oz. white chocolate chips
1 tbsp. pure vanilla extract
Warm the milk in a saucepan over medium heat, stirring occasionally. When warm, add white chocolate. Turn off heat and whisk until pieces are melted. Add vanilla and stir.
Store in an airtight container in the fridge. This will last for several weeks.
Note: this will harden in the fridge. If you're using in a hot drink, just add a scoop of the sauce to your mug, and add the liquid. It'll melt when you stir the drink. If you want to use it as a sauce (like over a dessert), put a portion of it in a microwave-safe container and heat until it's warm/melted.
White Mocha: Combine 2 oz freshly brewed espresso, 1/2 cup steamed milk, and 1 tbsp. (or to taste) of the white chocolate sauce. Stir, add whipped cream if desired, and enjoy!
Why I love it? It's DELICIOUS, that's why! :) It's also cheaper to make it than to buy it. The ingredients cost me $3.50 at WalMart. I made a half batch this time (so $1.75) and there's enough to last me a while. With my favorite white chocolate mocha costing $3.75 at Starbucks, this is a pretty good money saver.
Subscribe to:
Posts (Atom)