Saturday, April 30, 2011

Cookie Dough Bites

For Easter, my task was to make ice cream (using my mom's new ice cream maker). What sounded most interesting to me was to make cookie dough flavor! :) I ended up making vanilla ice cream with bits of cookie dough mixed in.

This recipe is based on one I found at www.allrecipes.com, and what makes it unique is that it has no egg in it- so it's perfectly safe & edible while raw! Perfect for mixing in ice cream, or just eating out of the freezer! (I don't recommend baking this though- its texture wouldn't turn out right)


I didn't take a picture of mine, but this is what it looked like before adding to the ice cream.

Cookie Dough
Printable version here

1/4 cup and 2 tbsp. brown sugar
1/4 cup white sugar
1/4 cup butter, softened (or even a little melted)
1 tsp. vanilla
3 tbsp. milk
1/2 tsp. salt
Pinch of baking soda
1/2 cup mini chocolate chips
1 cup flour

Mix all ingredients together in a medium bowl. Start with the wet ingredients, end with the flour. Store in the refrigerator, or in the freezer for longer storage.

Why I love it? Cookie dough you can eat raw, without feeling guilty. Enough said! ;) It's delicious and easy.

Thursday, April 28, 2011

Glazed Meatloaf

Sorry for the lack of posts recently, life has been just a little nuts! Sick kids, sick mommy, trip across the state for Easter, car falling apart after said trip, and replace car with a newer one! Whew!

Anyway, here's a meatloaf recipe that I love. I found it in a Cook's Country magazine, and I'm so glad I tried it! It is delicious! The ingredient list is a little long, but they're all items I normally have on-hand. Also, the steps seem a little goofy, but trust me it all works out. :)


Glazed Meatloaf
Printable version here

8 Saltine crackers
1/6 cup milk (use half of a 1/3 cup measuring cup)

1 tsp. vegetable oil
1/2 onion, chopped fine
1 garlic clove, minced

1 lb. ground beef
1 egg
1 tsp. mustard
1 tsp. Worcestershire sauce
1/4 tsp. dried thyme
1/2 tsp. salt
1/4 tsp. pepper

1/2 cup ketchup (and/or tomato sauce)
2 tbsp. brown sugar
1 tbsp. apple cider vinegar (or a little less for a less strong taste)
1/4 tsp. Tabasco sauce

1. Make binder: Crush Saltine crackers in a ziploc bag. Pour into a large bowl; add milk & stir.

2. Cook vegetables: Heat oil in small nonstick pan over medium heat until shimmering. Cook onion until golden, about 5 minutes. Add garlic & cook 30 more seconds. Transfer this mixture to the large bowl.

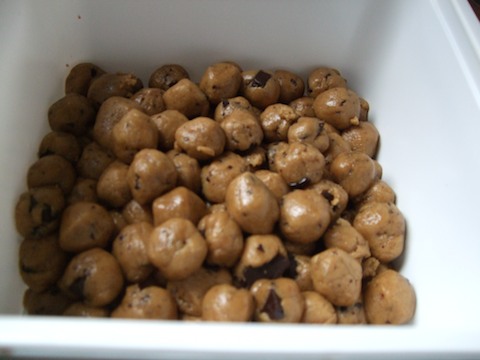
3. Meat mixture: Add beef to the bowl, and mix until well combined. Then add remaining ingredients (from the egg to the pepper) & mix until just combined. Shape meat into a loaf shape on a baking sheet (that has been covered with foil & sprayed with nonstick spray).

4. Broil: Adjust oven racks so one is about 4" from broiler and the other is in the middle. Preheat broiler on high. While preheating, make glaze.

5. Glaze: Whisk the remaining ingredients (ketchup through Tabasco) in small saucepan over low heat until sugar dissolves. Set aside.

6. Bake: Broil the plain loaf until well browned, about 5 minutes. Remove from oven, brush 2 tbsp. of the glaze over top & sides and broil about 2 more minutes, until glaze begins to brown. Then brush 2 more tbsp. glaze over the loaf, insert probe thermometer (if using), and bake on middle rack at 350º until loaf registers 160º, about 28-30 minutes.

Transfer to cutting board, tent with foil, and let rest 10-15 minutes. While resting, simmer remaining glaze over medium-low heat until slightly thickened. Slice meatloaf & serve with cooked glaze.

The formed loaf, just before broiling


Broiling away!


After broiling & brushing with glaze, ready for the final baking


That funny-looking thermometer above, if you haven't seen one before, is called a probe thermometer. Since I "discovered" these a few years ago, it has made several cooking tasks much easier!! They are SO nice for cooking meat- like meatloaf, whole turkey, chicken, etc. You set the timer to beep at a certain temperature, then you always know that your meat is perfectly cooked! This is the one I have:

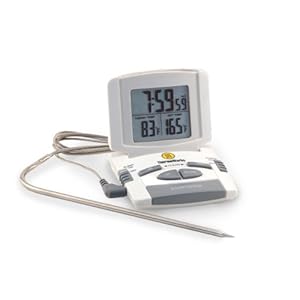
Thermoworks Probe Thermometer/Timer, it's $25 with shipping at Amazon.

Thursday, April 21, 2011

Minestrone Soup


Tonight's dinner came from an old recipe from my grandma. I wish she were still here, as I know we would have a blast together talking about cooking! She cooked for years for her family of 7. This soup recipe of hers is pretty simple, thrifty, and hearty!

Minestrone Soup
Printable version here

4 slices bacon, chopped
½ cup diced onions
2 ribs celery, diced
2 cloves garlic, minced
1 tsp. dried basil (or Italian seasoning)
1 (14 oz.) can beef broth (or 2 cups)
1 (11 oz.) can bean & bacon soup
1 (14.5 oz) can diced tomatoes, undrained
½ cup small noodles (any kind)
1 medium zucchini, diced

1. Cook bacon, onion, and celery until vegetables are softened. Next add garlic and saute until fragrant, about 30 seconds.

2. Add dried basil, broth, bean & bacon soup, 1 1/2 empty soup cans worth of water, and can of tomatoes; bring to a simmer.

3. Add noodles; when halfway done add zucchini and cook until tender. Add salt and pepper to taste.

Why I love it? Well I'm attached to it because it's from my grandma, but other than that, I like that it's pretty healthy, quick to make, and just different from all my other soup recipes. It's also adaptable- you can add other ingredients, change the amounts, etc.

Tuesday, April 19, 2011

Spreadable Butter

Lately I've been using margarine less often. I'm still on the fence about if I believe it's bad for you or not. I know butter tastes better though, and bakes better, so I've been mostly using that. The one thing I hadn't replaced yet was tub margarine, for spreading on things like toast.

Then I found a recipe online for "Spreadable Butter", and it works! (Found here) If you can get butter for a good price, it's cheaper to make this than to buy margarine. I used unsalted butter when I made this, but next time I would probably add a little salt, or use salted butter. I don't miss the slightly salty taste, but my toast-fiend husband does. ;)

Done mixing


Done & ready to chill! It fit in this margarine container, with just a little extra.


Spreadable Butter

2 sticks butter, room temperature
1/2 cup canola or vegetable oil
1/2 cup water, room temperature

1. Using a stand mixer or electric hand-held mixer, beat butter on high until fluffy.

2. Continue mixing, and slowly add oil. After that, slowly add water. (I turned down the mixer to med. so it wouldn't splash)

3. Pour into a container, and store in refrigerator. It will become set in a few hours.

Why I love it? It's easy, cheap, and tastes pretty good! There are no "fake" ingredients in it. It's a little firmer than margarine, but still very spreadable for butter.

Wednesday, April 13, 2011

Breakfast Burritos


Someone shared this recipe on a message board recently, and it caught my eye. Dave gets up & leaves for work while the rest of us are still sleeping, so I like having something easy for him to make for breakfast. This recipe makes about 20 burritos. It really wasn't much work to make them, and they're pretty tasty.


Breakfast Burritos
Printable version here

1 lb. sausage (I used a 12 oz. package)
12 eggs, beaten together
1 cup salsa (I used taco sauce)
2 cups shredded cheese
20 medium tortillas

1. Brown the sausage, drain, and set aside.

2. In the same pan, add the eggs and scramble. When cooked through, mix with cooked sausage & the salsa.

3. Add about 1/4 cup of this mixture to each tortilla, then top with shredded cheese. Fold into burritos.

4. Flash freeze (set them on a cookie sheet or baking pan, leaving a little space in between, so they don't stick together), then place in a Ziploc bag or two.

To serve: Cover each burrito with a paper towel, microwave until hot, about 1 1/2 minutes.

Why I love it? Mainly, I love the convenience of these. It's so nice being able to pull these out of the freezer for breakfast (or anytime!). They didn't take long to make, especially considering how many I made.

Tuesday, April 5, 2011

Condensed Cream of Celery Soup

A few days ago, I was shopping for the ingredients to make Cheesy Ham & Potatoes. I was making the casserole for a friend, and one of the requirements her family has is no soy products. So I read the label for the condensed celery soup, and of course found soy, along with a lot of other random ingredients. MSG, soy something or other, artificial flavoring, mushy celery... sorry Campbell's, you just converted me to making my own. I threw a bunch of celery in my cart & determined to figure it out.

I found 2 recipes online that looked like what I wanted, so I combined them and came up with this. It is delicious, has simple ingredients, and is a ton cheaper than the cans! Plus the celery actually looks & tastes like celery! I'm planning to make a batch of it to freeze, so it won't add too much time when I'm making dinner. The Cheesy Ham & Potato casserole turned out better than ever when made with this. I hope you like it!

* You can alter this to make whatever kind of condensed soup you want. I've also made it with finely diced mushrooms & beef broth in place of the chicken broth, and it made a pretty good cream of mushroom soup.

Condensed Cream of Celery Soup
Printable version here

Yield: The amount of 2 (10.75 oz.) cans

3 tbsp. butter
2 tbsp. minced onion
3 celery ribs, minced (a food processor works great for this)
1 clove garlic, minced
1/4 cup flour
1 cup milk
1 1/4 cup chicken broth
Salt & pepper to taste

Melt butter in a saucepan over medium-low heat; add onion & celery and saute until tender (about 5 minutes). Add garlic & saute 30 seconds more.

Add flour and whisk until smooth and bubbly (mixture will be thick). Cook for 1 minute.  Gradually add milk & broth, whisking to keep smooth.

Bring to a gentle boil, whisking constantly. Simmer for a few minutes until thickened. Add salt & pepper to taste.

Notes:
-
Soup can be frozen for later use. It will separate after thawing. To fix this, I heat the thawed soup in a small pan, and whisk occasionally. By the time it is heated through, it is back to normal.

(The recipe that this is based on was taken from here)

Sunday, April 3, 2011

Immersion Blender

I got an immersion blender last year for my birthday (by request). I don't use it very often, but for the times I need it, it is the PERFECT tool! Mine is by KitchenAid. I mainly use it for pureeing things like tomato soup, potato soup, or sauces.

In case you have one, I wanted to share a great tip I just learned about using them! My main hesitation with using this blender is that I don't want to make a mess and/or get splashed in the face with hot liquid. Not anymore!! Here's what you do:


1. Take a grocery bag, and poke a small hole in the bottom of it.

2. Put the attachment of the immersion blender through the hole. I put the middle part of the attachment (the part opposite of the blade) through first, since it's narrower and would make a smaller hole.

3. Cover up your bowl/pan with the upside down bag, with your blender through it, and viola! Splash-free blending!