Saturday, March 31, 2012

Spring Break

My family's spring break just started today. I am on my way to CA to visit family, while my husband & kids stay home! I have the freezer stocked with meals, so I know they're eating at least one homemade meal a day. :) So, it'll be a week or so until I can post any new recipes...

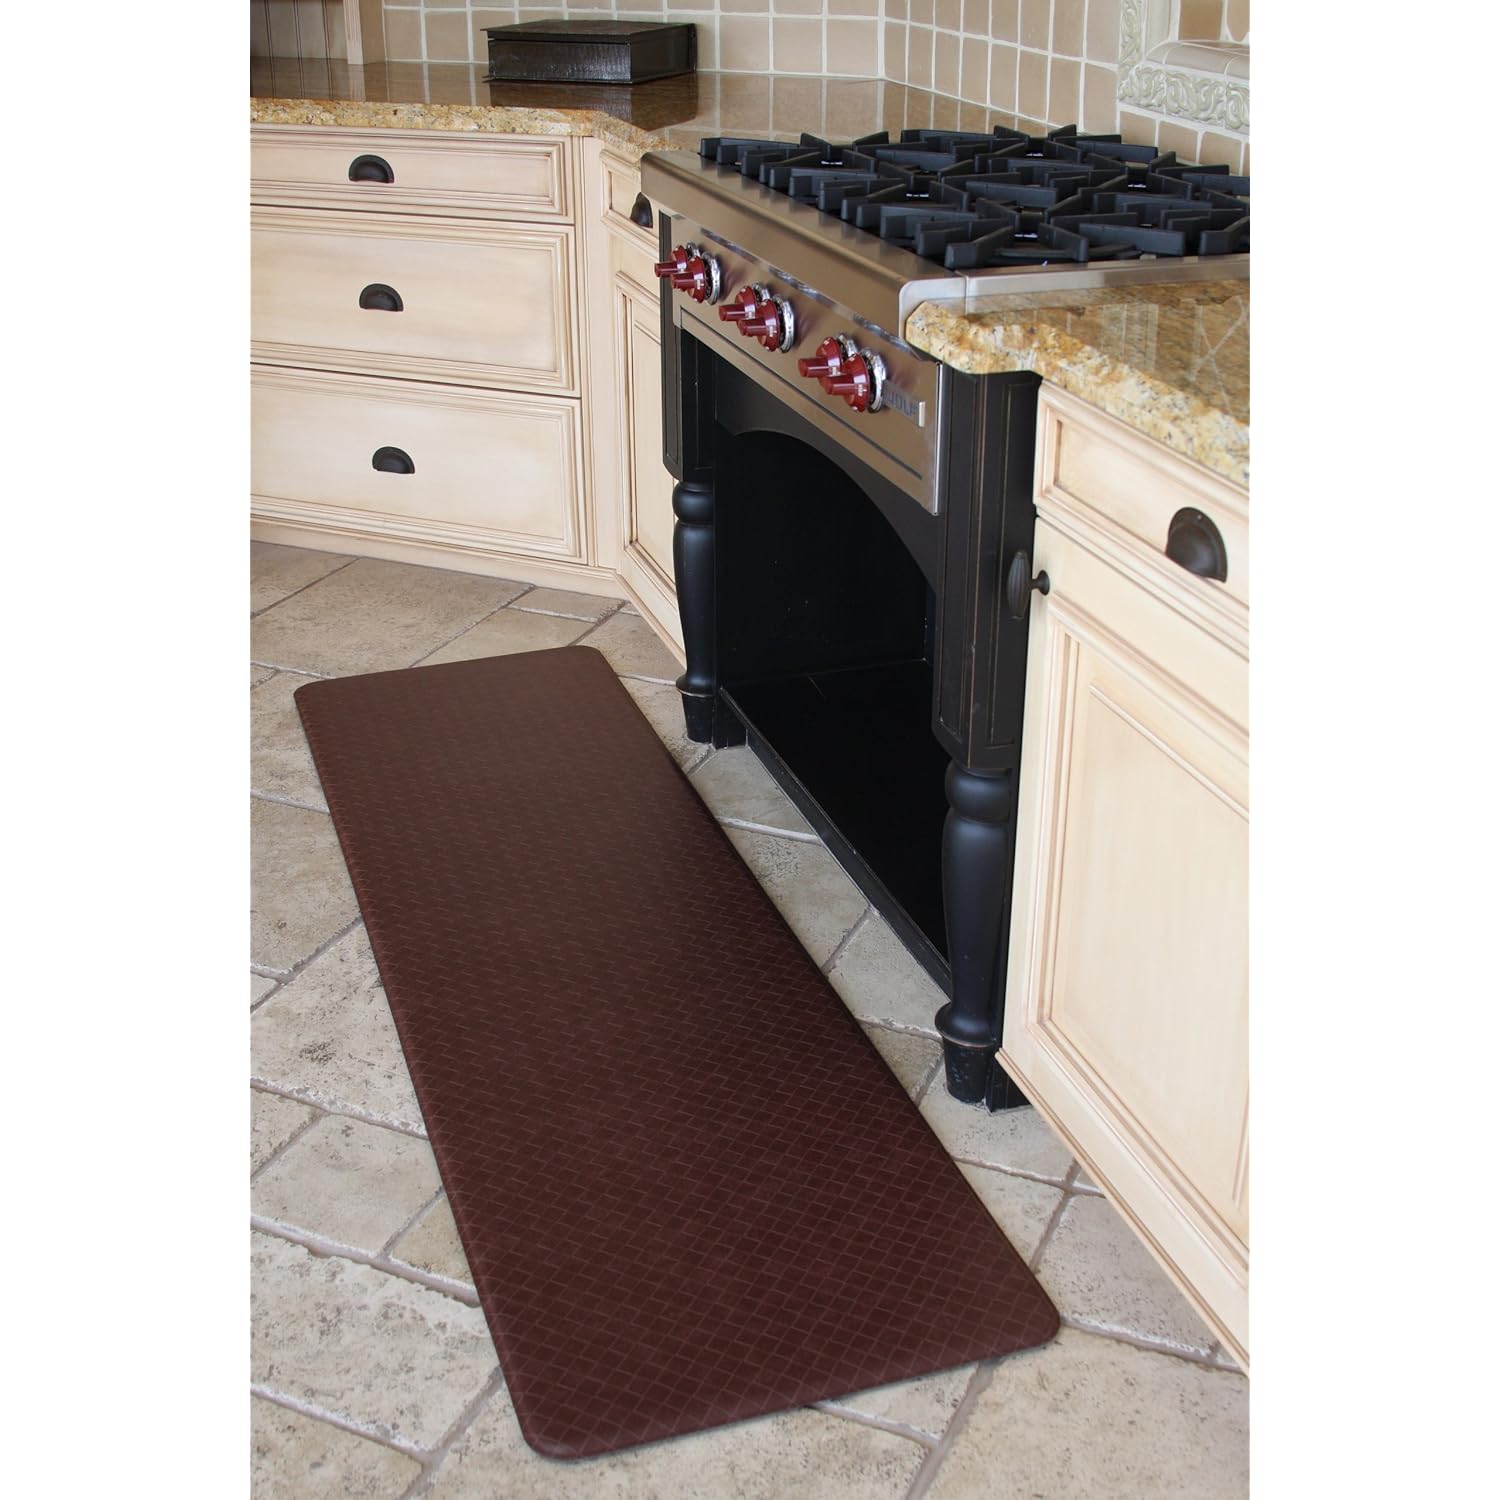
In the meantime, here's something neat to share. I requested (and got) this mat for my recent 30th birthday. I've only had it a few weeks, but so far, I love it!! My feet don't hurt like they used to! They come in various sizes & colors. If you do a lot of standing in the kitchen (like me), you might want to look into this!


(This is not my kitchen, it's the picture from Amazon. It's the exact same one I have though.)

Here's the link!
(I'm not affiliated with them in any way, I'm just trying to share something I like)

Thursday, March 29, 2012

Tangy Italian Dressing


I love making my own salad dressing. It's easy and it tastes good (usually better than store-bought), but one thing I really love is that my fridge isn't cluttered with numerous bottles of dressing. I don't need to have 5 kinds on hand, because I can just make them whenever I need a certain type. The homemade kinds last at least a couple weeks.

This dressing is supposed to be a copycat Olive Garden recipe. It's not exactly like theirs, but I think it's pretty close! It's Italian flavored, and has a definite tang to it (from the vinegar & lemon juice- feel free to use a little less of those ingredients if you don't want it tart). This is exactly how I make it though, and I love it!

(It's based on this recipe from food.com)

Tangy Italian Dressing
Printable version here

1/2 cup mayonnaise
1/3 cup white vinegar
1 tbsp. vegetable oil
2 tbsp. corn syrup
1/4 cup grated hard cheese- such as Parmesan, Asiago, or Romano
1/2 tsp. garlic salt
1/2 tsp. Italian seasoning
1/2 tsp. parsley flakes (dried or fresh)
1 tbsp. lemon juice
Pepper to taste

Mix all ingredients in a blender until well mixed. If it tastes too tart, you can add a little extra sugar or corn syrup. (Note- it doesn't taste as tart on a salad as it does by itself.)

Keep in a covered container in the refrigerator.

Why I love it? It's easy to throw together, and it tastes really fresh. I like it better than an Italian vinaigrette- I like that it's creamy and tangy.

Tuesday, March 27, 2012

Brownies


Are there certain foods where you feel like you need one standard, go-to recipe? Like brownies or chocolate chip cookies? Well, this find (from allrecipes.com) is now my standard brownie recipe. Easy, normal ingredients, gooey, and chocolatey! What more could a girl need?


Brownies
Printable version here

1/2 cup white sugar
2 tbsp. butter
2 tbsp. water
1 1/2 cups semisweet chocolate chips
2 eggs
1/2 tsp. vanilla extract
2/3 cup all-purpose flour
1/4 tsp. baking soda
1/2 tsp. salt

1. Preheat the oven to 325º. Grease an 8x8 inch square pan.

2. In a medium saucepan, combine the sugar, butter and water. Cook over medium heat until boiling. Remove from heat and stir in chocolate chips until melted and smooth. Mix in the eggs and vanilla. Pour chocolate mixture into a large mixing bowl. Combine the flour, baking soda and salt; stir into chocolate. Spread evenly into the prepared pan.

3. Bake for 25-30 minutes (mine take 30), until brownies set up. Do not overbake. Cool in pan and cut into squares. Tip- for easier removal, line pan with foil before greasing & filling.

Why I love it? They're ingredients I always have, which means (for better or for worse), that I can make these any time! They may not be health food, but I feel better about eating these compared to brownies from a box- plus they taste even better!

Wednesday, March 21, 2012

Chicken Enchilada Rice Bake


Two exciting things have happened since I posted last- I turned 30, and I got a new nephew! :) His name is Teagan, and he's a little cutie!! He missed my birthday by just one day. Last weekend we made the 4.5 hour trip to meet him (and visit family). Right now I'm working on helping my oldest recover from a sickness, homeschooling, and preparing for a trip to California in 1 1/2 weeks!

This recipe is one I found online (from here). It was as good as I hoped it would be! I've made it a few times now. It's healthy & filling, and delicious! It has the taste of enchiladas but is quicker to throw together.

You can make this recipe ahead of time and refrigerate until you're ready to bake it, just add 10 or so minutes to the cooking time. I'm also testing to see if it works as a freezer recipe- I think it'll work, my only hesitation is that it has sour cream in it (which supposedly doesn't freeze well). I'll be sure to update here once I know!

*The original recipe calls for you to layer these ingredients, but I have since found that I prefer to mix everything together instead. It's your call.

First two layers- brown rice & black beans


With the next two layers- the chicken/sauce mixture and grated cheese


Chicken Enchilada Rice Bake
Printable version here

1 1/2 cups dry rice (10.5 oz), cooked (equals about 4 1/2 cups cooked)
1 (15-oz.) can black beans, drained and rinsed
2 1/2 cups cooked, shredded chicken (2 medium chicken breasts)
1 (15-oz.) can mild green enchilada sauce
1 (15-oz.) can diced tomatoes, slightly drained
1/2 cup sour cream
1 tsp. kosher salt (or 1/2 tsp. table salt)
1/2 tsp. pepper
1 tsp. ground cumin
2 cups shredded cheddar cheese, divided

1. Preheat oven to 350º. Lightly grease a 9x13 inch baking dish (or two 8x8 or 9x9 inch dishes).

2. In a large bowl, combine all ingredients (using 1 cup of the cheese and setting aside the other cup).  Pour into baking dish, and then sprinkle remaining cheese on top.

3. Bake, uncovered, for 30 minutes or until heated through and cheese is melted.

Yield: 1 8-serving casserole dish, or 2 4-serving smaller dishes

*Rice: I use this baked brown rice in this recipe.

Recipe source: picky-palate.com

Why I love it? It is pretty easy to prepare, and a lot of the prep work can be done ahead of time. You can fully make the casserole beforehand, or just get the ingredients ready (like cook the chicken and rice, and grate the cheese). I love the flavor of it, too, and it's not too spicy for the kids. I'm sure you could change up the ingredients a little if you wanted- like adding corn or sliced olives. I like this just how it's written! :)

Wednesday, March 7, 2012

Easy Blender Salsa

I saw this recipe online a few days ago, and it immediately piqued my interest. I really like the taste of salsa, but I don't like chunks. So, a good-tasting salsa + super easy directions = WOW! I love this, probably more than any jarred salsa I've ever had. I also like it more than the from-scratch, canned salsa I made last summer. (Additional use for this salsa- mix it with an avocado for simple guacamole!)

I used mild Ro-tel and found it plenty spicy for my tastes. It also comes in original if you want more heat! By the way, these are my absolute favorite tortilla chips. I thought all chips were the same until I tried these! I've bought them at WalMart and WinCo.


Easy Blender Salsa
Printable version here

1 (14 oz.) can diced tomatoes, undrained
1 (10 oz.) can Ro-tel tomatoes, undrained
1/2 small onion, roughly chopped
1 clove garlic, minced
1 tsp. honey (or sugar)
1/2 tsp. salt
1/4 tsp. ground cumin
Small to medium size handful of cilantro, washed
Juice of 1 lime (about 1 tbsp.)

Combine all ingredients in a blender (or large food processor). Pulse to combine until all ingredients are finely chopped and salsa is the desired consistency. Adjust seasonings to taste. Store in a covered container in the refrigerator.

Yield: About 3 cups of salsa

Recipe source: Found here via Pinterest

Why I love it? As I already wrote, it is delicious, perfect if you like a smoother salsa, and so fast & easy! It's inexpensive, too, and can be made at any time of the year (since it uses canned tomatoes).

Monday, March 5, 2012

Pulled Pork Chili


A few months ago my in-laws bought half a pig, and gave us many packages of meat from that. I normally don't use pork very often (I like it, I just don't think of it often), so this gave me an opportunity to try out some new recipes! One of them was this chili. I had torn the recipe out of a Kraft Foods magazine about a year ago. I read the reviews of it online, and made a few changes based on what I read. This version, I think, is perfect! It's flavorful, but not too spicy. The meat is nice and tender!

One change I made to the recipe was to sear the meat in a pan before putting it in the crockpot. I have heard that that makes meat more flavorful, but without trying the two versions side-by-side (one with searing, one without), I can't tell you for sure if it makes a difference. I always sear it and I love the end result, but most likely this would still be delicious if you skipped that. Just a thought!

Pulled Pork Chili

Printable version here

1-2 tbsp. vegetable or canola oil
1 boneless pork roast, about 1 1/2 lbs., trimmed of fat
1/2 large onion, diced
2 cloves garlic, minced
1 can (14 1/2 oz.) reduced-sodium chicken broth
1 large can (15 oz.) tomato sauce
1 can (14 1/2 oz.) diced tomatoes, undrained
1 can (15 1/2 oz.) red kidney beans, drained & rinsed
1 can (15 1/2 oz.) black beans, drained & rinsed
2 tbsp. chili powder
1 tsp. ground cumin
1 tsp. ground coriander (or you can substitute an additional tsp. of cumin)
Toppings such as sour cream & grated cheese

1. (Optional step) Preheat a large skillet (I use a 12-inch cast iron pan) to medium-high. Drizzle the pan with oil. Next, place the pork roast in the hot pan, and leave undisturbed for 3 minutes to brown. Flip to the other side, and continue browning each side like this, until pork is browned on most surfaces. Remove from pan and place in slow cooker.

2. Add a little more oil to pan, then add diced onions. Saute until onions are lightly browned. Add minced garlic, cook for 30 more seconds, then add about 1/4 cup of the broth. Stir pan, scraping up any browned bits from the bottom. Pour this mixture in the slow cooker.

3. Add remaining ingredients to slow cooker, stir. (Alternately, just add all ingredients at once.) Cover and cook on high for about 7 hours (or low for 10-12 hours). Remove pork from slow cooker. Shred, then mix it in with the chili.

Adapted from Kraft Food & Family Magazine

Why I love it? It works very well in the crock pot. It takes me less than 1/2 an hour to prepare in the morning, then dinnertime is so simple! Normally I make chili with ground beef, so this is a nice change. The pulled pork turns out perfectly!
Sunday, March 4, 2012

Italian Bow Tie Salad

Pasta salad isn't a dish I make very often. I don't normally have a lot of time to make side dishes, and if I'm going to a potluck-type thing, I usually prefer to bring a dessert! :) Well last weekend I needed to bring a dish to an event, and I'm trying to eat a little healthier... so, I took another look at this recipe.

I've made it a couple times over the last few years, each time changing it up a little. This time I switched the cheese (from mozzarella to Monterrey Jack) and added a roasted red pepper (here is how to make that). It was great! The flavors worked well together, and I loved how colorful it was. Several people told me they really liked it. I might still keep trying to make it better (let me know if you have any suggestions!), but for now, here's a really good version of an Italian pasta salad!

This is what I used for the dressing- you mix this packet with oil, white vinegar, and water.


Italian Bow Tie Salad
Printable version here

6 oz. uncooked bow tie pasta (about 3 cups)
1/2 to 3/4 cup Italian dressing (such as Good Seasons Zesty Italian)
1 small can (2.25 oz.) sliced olives, drained & rinsed
8 oz. grape tomatoes, halved
5 oz. Monterrey Jack cheese, cubed
1 red pepper (roasted, peeled & diced)
Salt & pepper (to taste)

1. Cook pasta according to package directions. Rinse with cold water; drain.

2. Combine cooked pasta and all remaining ingredients in large bowl. Season with salt & pepper to taste. Cover; refrigerate at least 1 hour. (If serving the next day- stir well before serving, adding more dressing if pasta seems to have dried out a little.)

Ingredient amounts are just suggestions- feel free to change things up!

Why I love it? It's an easy dish for a potluck, picnic, or even just to make for a few days' worth of lunches. It is colorful, and the flavors work well together!