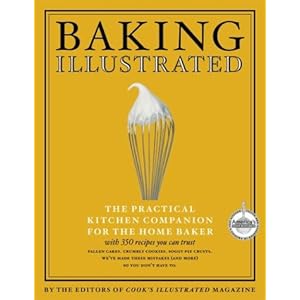
It's only $23 on Amazon- I'd add it to your Christmas list if you don't already have it! :)
Buttermilk Sandwich Bread
Printable version here
3 3/4 cups (18.5 oz.) unbleached all-purpose flour, plus more for dusting the work surface
2 teaspoons salt
1 cup cold buttermilk (can use 1 cup of milk with 1 tbsp lemon juice as a substitute, mix milk and lemon juice and let it set for about 10 min. prior to using)
1/3 cup boiling water
2 tablespoons unsalted butter, melted
3 tablespoons honey (2.2 oz.)
1 envelope instant yeast (about 2 1/4 teaspoons)
1. Adjust oven rack to lowest position and heat oven to 200 degrees. Once the oven temperature reaches 200 degrees, maintain the heat for 10 minutes, then turn off the oven.
2. Mix 3 1/2 cups of the flour (17.5 oz.) and the salt in the bowl of a standing mixer fitted with the dough hook. Mix the milk, water, butter, honey, and yeast in a 4-cup liquid measuring cup. Turn the machine to low and slowly add the liquid. When the dough comes together, increase the speed to medium and mix until the dough is smooth and satiny, stopping the machine two or three times to scrape dough from the hook, if necessary, about 10 min. (After 5 minutes of kneading, if the dough is still sticking to the sides of the bowl, add flour, 1 tablespoon at a time and up to 1/4 cup total, until the dough is no longer sticky.) Turn the dough onto a lightly floured work surface; knead to form a smooth, round ball, about 15 seconds. (Don't be alarmed if this makes your mixer go nuts!! LOL)
3. Place dough in very lightly oiled large bowl, rubbing the dough around the bowl to coat lightly. Cover the bowl with a damp cloth and place it in the warmed oven until the dough doubles in size, 50 to 60 minutes. (This picture is before rising)

4. Gently press the dough into a rectangle 1 inch thick and no longer than 9 inches. With a long side facing you, roll the dough firmly into a cylinder, pressing with your fingers to make sure the dough sticks to itself. Turn the dough seam-side up and pinch it closed. Place the dough seam-side down in a greased 9 by 5-inch loaf pan and press it gently so it touches all four sides of the pan. Cover with damp cloth; set aside in warm spot until the dough almost doubles in size 20-30 min. (Picture is after rising)

5. Keep one oven rack at the lowest position and place the other at the middle position and heat the oven to 350 degrees. Place an empty baking pan on the bottom rack. Bring 2 cups of water to a boil in a small saucepan. Pour boiling water into the empty pan on the bottom rack and set the loaf onto the middle rack. Bake until an instant-read thermometer inserted at an angle from the short end just above the pan rim into the center of the loaf reads 195 degrees, 40 to 50 minutes (mine took 42 minutes). Remove bread from the pan, transfer to wire rack, and cool to room temperature. Slice and serve.

*If you'd like, you can substitute wheat flour for part of the white flour. I do about 2:1 regular to wheat flour.
Why I love it? For one, the smell while it's baking is amazing!! I think they should make candles in this scent! The bread tastes fantastic, it's inexpensive, and I like that I know exactly what's in it. Simple ingredients, nothing funny. It does take a bit of time to make, but most of it is hands-off. I timed myself tonight as I made another loaf, and start to finish it took 3 hours. That was with distractions- I'm sure it could be made a little faster in a quiet kitchen. :)


Did you make this? I need a bread pan, LOL
ReplyDeleteYes, that's what's in the picture at the top of the blog. It was delicious! I used a regular 9x5 metal baking pan. The recipe sounds tedious, but it's not hard. All the steps work together to make it just perfect! :)
ReplyDelete