Showing posts with label Snack. Show all posts

Sunday, November 16, 2014

Chocolate Chip Snack Cake


This chocolate chip snack cake is an easy thing to whip up for a yummy snack or simple dessert. It's a light vanilla-flavored cake, with a layer of chocolate chips & cinnamon in the middle and on top. Just mix it in one bowl, bake in a square dish, and serve just like that! It doesn't need frosting, cooling, or anything like that.

I lightened up the original recipe a little bit- I reduced the butter, subbed yogurt for most of the sour cream (you could probably use all yogurt if you had no sour cream), and reduced the amount of chocolate chips.  Even with all that tinkering, this is still a soft and flavorful cake!

You might notice this calls for room temperature eggs. This is common with baking cakes from scratch, because if you add cold eggs to a sugar/butter mixture, they're likely to make the butter clump up and look like bits of cottage cheese. With the ingredients at room temperature, this doesn't happen and you have a smoother batter. If you're taking your eggs right out of the fridge (like I normally do), you can put them in a cup or bowl of warm water for 10 or so minutes to take the chill off them. Problem solved!

Adapted from: Mel's Kitchen Cafe

Chocolate Chip Snack Cake
Printable version here

Cake batter
4 tbsp. butter, softened
2 tbsp. applesauce (or an additional 2 tbsp. butter)
6 oz. vanilla yogurt
1/4 cup sour cream
2 eggs, room temperature
1/2 tsp. vanilla
1/3 cup sugar
1 1/3 cup flour (all-purpose)
1 1/4 tsp. baking powder
1/4 tsp. baking soda
1/4 tsp. salt

Filling & topping
Cinnamon/sugar mixture (I keep mine in a shaker container)
1/3 cup (or more) chocolate chips

1. Combine all wet ingredients, including sugar.  Mix until it is relatively smooth.  Add dry ingredients and mix just until no streaks of flour remain.

2. Grease a metal* 9x9 pan with cooking spray or shortening.  Spread half the cake batter into pan (it will be somewhat thick).  Sprinkle top with cinnamon/sugar and half the chocolate chips. Repeat layers one time.

3. Bake at 350º for 28 minutes (or until a toothpick inserted in the center comes out with only a few crumbs).

 *If using glass pan, lower temperature to 325º and add a few minutes to the baking time.  I haven't tried it, but the original recipe suggests doing this. 

Why I love it? It is ridiculously simple & good.  It's fluffy, vanilla-y, and chocolatey!  It just dirties one bowl and one pan!

Thursday, December 12, 2013

Hot Chocolate Mix

Isn't this adorable?  These are the gifts we gave to one of the kids' Sunday School teachers.  I didn't add it up, but they probably cost no more than $2-3 each.  These are pint sized jars, which you can fill up 3 from this recipe.  It's basically sugar and chocolate, most of which is ground up real chocolate (as opposed to powder).  Which, I learned recently- makes this hot chocolate as opposed to hot cocoa.  Hot chocolate is made using chocolate bars or chips (that have cocoa butter in them); hot cocoa is made using just cocoa powder.

This mix makes delicious hot chocolate- it's smooth and perfectly chocolatey.  There's nothing overpowering in it, just rich, warm chocolate!  I got all the ingredients for this in the bulk section at WinCo.  The only thing this recipe was missing was a batch of homemade Peppermint Marshmallows!

The recipe calls for a food processor for mixing.  I'll tell you what I did, as a precaution- I tried using my blender, since my food processor is small.  That didn't work well at all- I think because the blender is tall, and since there was no liquid, it had a hard time pulling the chocolate near the blades (even with being a Vitamix!).  I then dumped it out and processed it in batches- which did work.  Next time (which there will be one!) I will do it in smaller batches in my food processor.  Just a head's up! :)

Merry Christmas, everyone!

Hot Chocolate Mix
Printable version here

2 cups (14 oz.) granulated sugar
2 teaspoons vanilla
2 1/2 cups (12.5 oz.) semi-sweet chocolate
3/4 cup (4 oz.) milk chocolate
1 cup (3 oz.) cocoa powder
Pinch of salt

[Note- you need to use a large food processor, or work in batches]

1. In the bowl of a food processor, combine the sugar and vanilla and pulse for 5-6 seconds until well combined.

2. Coarsely chop the semi-sweet and milk chocolates (unless they're already chips) and add them to the bowl.  Pulse in 10 second intervals until finely ground and combined with the vanilla sugar.

3. Add the cocoa powder and salt, pulsing again until everything is well mixed.  The mix will be slightly coarse, like brown sugar.  Pour into a large glass or plastic jar for storing.

4. For each cup of hot chocolate, combine 1/4 cup of mix with 8 ounces of hot milk.  Stir until all of the chocolate is melted. (Store mix airtight for 6-9 months)

Yield: 24 8-ounce servings (6 cups of mix)

Recipe source: King Arthur Flour

Why I love it? I like that it's a Christmas (or anytime) goodie I can give away that the recipient doesn't have to eat right away.  Unlike cookies or something that can go stale, they can enjoy this treat for a while to come!  The drink comes out very smooth, chocolatey, and not overly sweet.

Monday, December 9, 2013

Cinnamon Pecans


This is a recipe I pulled out of a MOPS magazine several years ago.  It has been sitting in my recipe binder ever since.  Had I known how easy & delicious it was, I would have made it many times by now!!  I made it recently to give as a Thanksgiving gift to my kids' Sunday School teachers (plus a thank you gift to the family members who hosted Thanksgiving).

They are really quick to make- about 5 minutes of prep, then just an hour to bake them in the oven.  I packaged them in half-pint (1 cup) canning jars, and was able to get 6 jars' worth of pecans.  I'm not sure exactly how long they stay fresh, as ours were gone within 4 days- but I think about a week should be fine.  The recipe cost about $7.25 to make, and including the jars, it still came out to under $2 per jar.

The pecans are crunchy, slightly sweet, and cinnamoney.  We ate them by themselves, but I think they would also make a great salad topping!  Everyone who ate them loved them!

Cinnamon Pecans
Printable version here

1 egg white
1 tsp. water
1 pound pecan halves
1/2 cup sugar
1/4 tsp. salt
1 tsp. cinnamon

Preheat oven to 250º.  Beat egg white and water until frothy.  Add pecans, coat well.  In a small bowl, mix sugar, salt and cinnamon.  Add to nut mixture and mix well.  Spread on large, flat, buttered or greased pan (or a pan lined with parchment paper) and bake for 1 hour, stirring every 15 minutes.

Cool completely on pan before packaging.  Store pecans in an airtight container for up to a week.

Yield: about 6 cups

Recipe source: MomSense Magazine Nov/Dec 2010

Why I love it? They are easy to make, delicious, and make a great gift!

Saturday, September 14, 2013

Fruit & Nut Granola Bars


I have made many different granola bar recipes- there are tons out there, and today I stumbled on a new favorite!  They were easy enough that my kids did a majority of the work, with me just peeking over their shoulders.  The only problem was that I wish there were more!  This batch made 10 bars- enough for everyone in my family to have two... Next time I'll double it and use a 9x13 pan instead.

Homemade granola bars can have a wide variety of consistencies- hard, soft, crumbly, chewy, etc.  I found these ones to be perfectly chewy, not very crumbly, and I love that they're both sweet & salty!  The fact that they don't use the oven is a bonus (during the long summer months)! 

Fruit & Nut Granola Bars
Printable version here

1 1/2 cups puffed rice cereal
1 cup uncooked quick-cooking oats
3 tbsp. ground flaxseed
1/4 cup dried fruit (such as cranberries or raisins)
1/4 cup finely chopped nuts (preferably roasted or toasted)
1/3 cup honey
2 tbsp. brown sugar
1/3 cup peanut butter
1 tsp. vanilla extract
1/2 tsp. ground cinnamon (optional)

1. Combine the cereal, oats, flaxseed meal, dried fruit, and nuts in a large bowl.  (If using a larger dried fruit like apricots, chop first into small pieces.)

2. Bring the honey and brown sugar to a boil in a small saucepan over medium-high heat, stirring constantly; remove from heat.  Stir in peanut butter and vanilla (and cinnamon if using) until blended.

3. Pour the peanut butter mixture over cereal mixture, stirring until all dry ingredients are coated (mixture will be stiff). 

4. Press mixture firmly into an 8-inch square pan (sprayed with nonstick cooking spray) using a large square of waxed paper (or your hands, sprayed with nonstick spray).  Cool completely in pan, and then cut into desired size bar. 

Yield: about 10 bars (You may also double the recipe and use a 9x13 pan)

Recipe Source: http://www.hammertown.com/2010/02/this-weeks-recipe-homemade-clif-bars/

Why I love it? They are cheaper & healthier than store-bought granola bars, they are customizable, and delicious!!  My kids and I both give them two hearty thumbs up!

Wednesday, July 10, 2013

Simple Guacamole


Guacamole- for me at least, this has been an acquired taste.  I didn't grow up eating it, and while I can still see why some don't like it, it has certainly been growing on me!  I like trying to get healthy fats (like avocado) in our diet, and this is a great way.  I have used this "recipe" as a topping for dishes like enchiladas, as a snack for dipping chips in, and as part of a layered dip.  It has worked great for all of these, and it is EASY!

I put recipe in quotation marks because I don't measure anything in this... it's more of a "suggestion" than an actual recipe.  I thought of it when I was looking up how to make guacamole, and realized that most of the ingredients (besides avocado) are the ingredients in salsa- which I normally have on hand. It's hardly more difficult than just mashing the avocado and adding salsa! (Here's the link to a ridiculously easy Blender Salsa recipe, if you haven't already tried it!)

I also like making it this way instead of buying it because it makes a great amount for one dinner (or snack).  I would never be able to use up a store-bought container of guacamole before it went bad, so I like being able to make it in small batches like this!  Plus it is so fresh- just make it a little before serving (to give the flavors time to combine), and you don't need to worry about it turning brown or needing preservatives.

Simple Guacamole
Printable version here

1 ripe avocado
Salsa- about 1 tablespoon, or to taste
Lime juice (bottled or fresh)- about 1 teaspoon
Salt- about 1/4 tsp.

Cut open avocado and remove pit.  In a small bowl, mash avocado with a fork.  Mix in remaining ingredients to taste.  Chill until serving.

*This will turn dark after a while, so eat it within a few hours of making it.

(If you want to see pictures of how to cut open an avocado, here's one site I found.)

Why I love it?  It's quick, uses ingredients I normally have on-hand (besides the avocado), costs under $1, and is a healthy condiment/snack!

Tuesday, July 9, 2013

Blueberry Oatmeal Muffins


Recently I searched for a new healthy blueberry muffin recipe, and this one looked appealing.  It did not disappoint!  So many muffin recipes are more like a disguised cupcake, with things like blueberries thrown in to make it look healthy.  But these, I actually feel good about giving my kids for breakfast!  Enjoy!

Recipe Source: Cooking Light, August 2010

Blueberry Oatmeal Muffins
Printable version here

1 2/3 cups quick-cooking oats
3 ounces all-purpose flour (about 2/3 cup)
2.33 ounces whole-wheat flour (about 1/2 cup)
3/4 cup packed light brown sugar (5.3 ounces)
2 tsp. ground cinnamon
1 tsp. baking powder
1 tsp. baking soda
3/4 tsp. salt

1 1/2 cups low-fat buttermilk
1/4 cup canola oil
2 tsp. grated lemon rind (from one small lemon)
2 large eggs
2 cups frozen blueberries
2 tbsp. all-purpose flour
2 tbsp. granulated sugar (or a cinnamon/sugar mixture)

1. Preheat oven to 400º.

2. Place oats in a food processor; pulse 5 to 6 times or until oats resemble coarse meal.  Place in a large bowl.

3. Weigh or lightly spoon flours into dry measuring cups; level with a knife.  Add flours and next 5 ingredients (through salt) to oats; stir well.  Make a well in center of mixture.

4. Combine buttermilk and next 3 ingredients (through eggs).  Add to flour mixture; stir just until moist.

5. Toss berries with 2 tablespoons flour, and gently fold into batter.  Scoop batter into 18 muffin cups coated with nonstick spray. (I use a 3 tbsp. cookie scoop that's filled a little over the top, so probably close to 1/4 cup) Sprinkle tops with either sugar or a cinnamon/sugar mixture (I keep some in a shaker container).  Bake at 400º for 20 minutes or until muffins spring back when touched lightly in center.  Remove from pans immediately; place on a wire rack.  Store in a covered container at room temperature for up to a couple days, or refrigerate or freeze for longer storage.

NOTES
  • I've only ever made this exactly as written, but I'm sure you could make slight changes to it and it would still turn out well.  Such as: substituting the all-purpose flour for wheat, omitting the lemon zest (or replacing it with orange zest), using fresh blueberries instead of frozen, and using buttermilk substitute instead of buttermilk (this explains how to).
  • As I only have one regular muffin pan, I had to bake a dozen of these muffins, wash the pan, and then bake 6 more.  Sometime I might scale this recipe down to equal a dozen, but we like them so much that I don't mind the hassle of washing the pan in between batches!
Why I love it? They are hearty without being dense, flavorful (I love the blueberries & hint of lemon!), and decently healthy!  The large batch size lets me feed my family of 5 and still have some leftover to freeze.

Thursday, October 4, 2012

Banana Muffins


So... I have an addiction that I think many of you might understand!

That addiction is... searching for new recipes!  Not a big surprise, huh?  I already have enough recipes to probably make something different each day of the year, yet I still can't stop looking.  This recipe is one example of why!  I have so many muffin recipes, but when I saw this one recommended online, I had to give it a try.

We are hooked on it!  It uses no fancy ingredients or equipment, yet the muffins come out fabulous!!  They are so flavorful and so soft.  The author of the blog where I found this recipe says that they taste even better the next day- that is, assuming you have any left!

One tip I have for this recipe is about how I mash bananas.  Last year for my birthday I asked for a potato ricer (it makes great mashed potatoes), and I found it also works great for mashing bananas!  This is the one I have.


Before I got that though, I would mash bananas by putting them in a ziploc bag, closing it, and mushing them that way.  The ricer is just a little more fun though. :)

Recipe Source: http://www.catcancook.com/awesome-banana-muffin-recipe/

Banana Muffins
Printable version here

3 or 4 large bananas, mashed
1/2 cup white sugar
1 slightly beaten egg
1/3 cup melted butter
1 tsp. baking soda
1 tsp. baking powder
1/2 tsp. salt
1 1/2 cups flour
1/3 cup mini chocolate chips and/or chopped walnuts (optional)

1. Mix the mashed banana, sugar, egg and butter together. Set aside. In a separate bowl, mix together baking soda, baking powder, salt and flour.  Mix wet and dry ingredients all together. Stir in chocolate chips and/or nuts. Pour into greased or paper-lined muffin tins. (I use a large cookie scoop for this.)

2. Bake at 350º for approximately 20 minutes.  Remove to a wire rack to cool.  Enjoy!

Yield: 12 muffins

Why I love it? They are simple, use ingredients I almost always have, and are so light & delicious!!  I would much rather give the kids one of these as a snack than something packaged.  It's just so good knowing exactly what they're eating! :-)

Tuesday, August 7, 2012

Zucchini Chocolate Chip Bread

 Both last summer & this summer, I have been given gigantic zucchinis from friends' gardens.  This is my favorite thing to make with it!  It makes 2 loaves, so I get to stick one in the freezer for later.  I found this recipe on allrecipes.com, and followed the changes suggested by many of the reviewers, plus threw in some mini chocolate chips for good measure. :) All of my kids love this, including my "I don't like bread" eater!

 This was my 3 cups of grated zucchini (I used a grating attachment on my KitchenAid to grate it).  My zucchini was so big, I still had 4 cups left over!


Zucchini Chocolate Chip Bread
Printable version here

3 cups flour (I use half white & half wheat)
1 tsp. salt
1 tsp. baking soda
1 tsp. baking powder
2 tsp. cinnamon
3 eggs
1/2 cup applesauce
1/2 cup oil (such as canola or vegetable)
2/3 cup granulated sugar
2/3 cup brown sugar
1 tbsp. vanilla
3 cups grated zucchini, loosely packed
3/4 cup mini chocolate chips

1. Grease and flour two 8x4-inch pans, set aside.  Combine dry ingredients (flour through cinnamon) in a bowl and set aside.

2. Beat eggs, applesauce, oil, vanilla, and sugars in a large bowl until combined.  Add dry ingredients and mix well.  Stir in zucchini and chocolate chips.  Pour evenly into the two loaf pans.

3. Bake at 325º for 65 minutes, or until a toothpick comes out dry when poked in the middle of the loaf.  Cool in pan on a wire rack for 10 minutes, remove from pans, then cool completely on the rack.  Store in a covered container at room temperature for a couple days, or freeze (wrapped in plastic wrap and foil) for longer storage.

Yield: Two loaves (Alternately, you could make this into 24 muffins, and cook those about 27 minutes)

Recipe source: Adapted from this recipe http://allrecipes.com/recipe/moms-zucchini-bread

Why I love it? I asked my kids, and they said: "It has chocolate chips, and the zucchini bread tastes good...  I like it because of the chocolate, and I might not have liked the zucchini by itself, but I couldn't even taste it!  It just tastes like chocolate chip bread, that's it!" There you have it!

Thursday, June 14, 2012

Trail Mix Muffins (Mix in a Jar)


Just like my last post, here is a "Mix in a Jar" recipe.  I made both these and the oatmeal chip cookie mixes to give away as gifts to my MOPS group.  I got to keep one of these jars for myself, and I so enjoyed making it this morning- I wasn't even fully awake yet, but this was so easy I could get these going for the kids!

These muffins are pretty much what the name sounds like- full of goodies like what you would find in trail mix. (The only thing missing, according to my 5 year old, is M&M's!)  They have dried fruit, coconut, nuts, and some good whole grains.  But even with all that, they're still pretty light & fluffy.

Trail Mix Muffins (Mix in a Jar)
Printable version: Recipe
Printable version: Sheet of 6 gift tag instructions

Jar ingredients
1/3 cup sugar
1/2 cup old fashioned (or quick) oats
1/3 cup raisins (or other dried fruit)
1/2 cup flaked coconut
1/2 cup wheat germ*
1/2 cup chopped nuts
1/3 cup lightly packed brown sugar
1 1/2 cups flour (I use 1 cup all purpose & 1/2 cup wheat)
2 tsp. baking powder
1 tsp. cinnamon
1/4 tsp. salt

Additional ingredients
1/4 cup oil
1/4 cup applesauce (or you can substitute an additional 1/4 cup oil)
1/2 cup water
2 eggs

1. In a 1-quart glass jar, layer the sugar, oats, raisins, coconut, wheat germ, nuts, and brown sugar, packing well between each layer.  Then in a small bowl combine flour, baking powder, cinnamon, and salt, and add this to the jar.  Press down to fit. Cover and store in a cool dry place.  Yield: 12 muffins

2. To prepare muffins- Empty jar into a large mixing bowl, blend dry ingredients thoroughly.  Add oil, applesauce, water and eggs, and mix until just blended.  Fill 12 standard size muffin cups (use liners or nonstick spray).  Bake at 350º for 21 minutes.  Cool on wire rack.

* I get wheat germ at any store with a bulk food section.  Here is an article that lists other substitutes for wheat germ, if you don't have (or can't find) it.


Why I love it? Well I like the fact that it fits in a jar, and it's a pretty tasty muffin.  It has a lot of different flavors & textures.  Plus, it's much healthier than muffins you can buy!  I actually feel good about feeding this to my kids for breakfast.

Thursday, May 24, 2012

Peanut Butter Banana Oatmeal Squares

(I'm sorry about the serious lack of posting lately- I've been so busy with various activities, and finishing up the year homeschooling.  I have been making a lot of new recipes lately & taking tons of pictures, so I'll have plenty to post about once I find the time!  Just 2 weeks left of school, then I'll be back.)

I saw this recipe on Pinterest, and right away it looked interesting.  I'm always up for an easy, yummy breakfast recipe!  The kids and I love these- even my picky eater who refuses to eat a bowl of oatmeal, he'll eat this because it's in bar form!  Silly boy.  These bars will last a few days at room temperature, and if you want you can reheat them before eating.  Enjoy!

Peanut Butter Banana Oatmeal Squares
Printable version here

1 1/2 cups oats (old fashioned or quick)
1/4 cup packed light brown sugar
1 tsp. baking powder
1/2 tsp. kosher salt (or 1/4 tsp. table salt)
1 tsp. ground cinnamon
1 tsp. vanilla extract
1/2 cup milk
1 large egg, lightly beaten
1 large banana, mashed
1/4 cup creamy peanut butter

1. Mix together the oats, brown sugar (I used a little less than 1/4 cup), baking powder, salt, and cinnamon.

2. Add in the vanilla, milk, and egg.  Mix the ingredients together.  Then add in the mashed banana and peanut butter and stir to combine.

3. Pour the mixture into a lightly greased 8x8 inch baking pan.  Bake at 350º for 20 minutes.  Cool, cut into squares, and enjoy!

Recipe source: gingerbreadbagels.com

Why I love it?  They are ingredients I almost always have (normally I just have to wait for a ripe banana), they have a good amount of nutrition in them (fiber, protein, and some good fats), they're easy, and they taste great! 

Tuesday, April 17, 2012

Roasted Red Pepper Hummus


For the past month or so, I have been trying to eat better- I feel like my diet wasn't too bad, but it could definitely benefit from eating less sugar. One healthy snack I've been eating more of is hummus. I decided to try making it from scratch, and I love this version I have come up with!! I love eating it with crackers (they make even the plainest, healthiest cracker taste good), and have found that it makes a great spread on bread! I could also just eat it off a spoon... :)

You could use roasted red peppers from a jar, but it's also easy to make them yourself. You can make them up to a few days before making the hummus, then it makes it go even faster. HERE is how to make them.

Roasted Red Pepper Hummus
Printable version here

2 tbsp. olive oil
2 cloves garlic, minced
15 oz. can garbanzo beans (a.k.a. chickpeas), rinsed, drained, & skins off*
1 roasted red pepper
3 tbsp. lemon juice (approx. 1 med. lemon)
2 tbsp. tahini
1/2 tsp. cumin
1/2 tsp. salt
1/4 tsp. cayenne pepper

1. In a small pan, heat the olive oil over medium-low heat. After about a minute, add the garlic. Cook, stirring frequently, for about 30 seconds. Remove from heat and pour garlic mixture into a food processor. (Be careful, because garlic burns easily if cooked too long or the heat is too high.)

2. Add remaining ingredients to food processor. Process until hummus is a smooth consistency. Transfer to a covered bowl & store in the refrigerator. Yield: about 2 cups.

*Garbanzo beans have a papery outer skin. This is a little time consuming to peel off, but it makes for a smoother hummus. One way to get it off faster is to put the rinsed beans on a clean towel, and rub the beans vigorously with the towel. That helps loosen the skins.

Why I love it? The main reason I love this is because it tastes great!! The flavors go together so well- not one of them stands out to me. I can taste the red pepper (which also helps give it a nice color), and the cayenne makes it just the right amount of spiciness. It has less preservatives than store-bought hummus, and it's cheaper, too. Another advantage of making it yourself is that you can adjust the ingredients to your tastes. You could easily make this more or less spicy, more garlicky, etc. I hope you enjoy it!

Tuesday, April 10, 2012

Giant Cookie


I got this recipe, once again, from Mel's Kitchen Cafe. I have not been let down once by that site! On her site she shows how you could wrap up these cookies to give as gifts. So far I've just made them when I (or the kids) need a little snack. Sometimes you just need cookies, you know?? Especially my 3 year old daughter... she likes sweets, just like her mom! :)

Giant Cookie
Printable version here

1/4 cup white sugar
1/4 cup packed light brown sugar
1/4 cup butter, melted and cooled
1 egg
1/4 tsp. baking soda
1/4 tsp. salt
1/4 tsp. vanilla
3/4 cup flour
1/4 cup chocolate chips

1. Preheat oven to 350º. Line a large baking sheet with foil.

2. In a medium bowl, cream together the sugars and butter. Add the egg and vanilla and mix. Add the dry ingredients and mix well, then stir in the chocolate chips.

3. Press into a 1/4" thick circle on the baking sheet. (Make sure there is some room for the cookie to spread while baking.) Bake for 14 minutes or until lightly golden brown. Let the cookie cool on the baking sheet. Once cool, gently use the foil to lift the cookie off the pan.

Yield: 1 large cookie. Recipe can easily be doubled to make 2 large, or 1 giant cookie (although I haven't tried making one that big- you would need a very large baking sheet for that).

Recipe source: Mel's Kitchen Cafe

Why I love it? It's super quick to throw together, and you don't even have to scoop it into individual cookies! Just mix, press into a circle, bake, and cut (a pizza cutter works well). I like the size of the recipe, too- it's good for a snack or after dinner dessert, but it's not so big that I have tons of cookies leftover (to tempt me to eat them!).

Wednesday, March 7, 2012

Easy Blender Salsa

I saw this recipe online a few days ago, and it immediately piqued my interest. I really like the taste of salsa, but I don't like chunks. So, a good-tasting salsa + super easy directions = WOW! I love this, probably more than any jarred salsa I've ever had. I also like it more than the from-scratch, canned salsa I made last summer. (Additional use for this salsa- mix it with an avocado for simple guacamole!)

I used mild Ro-tel and found it plenty spicy for my tastes. It also comes in original if you want more heat! By the way, these are my absolute favorite tortilla chips. I thought all chips were the same until I tried these! I've bought them at WalMart and WinCo.


Easy Blender Salsa
Printable version here

1 (14 oz.) can diced tomatoes, undrained
1 (10 oz.) can Ro-tel tomatoes, undrained
1/2 small onion, roughly chopped
1 clove garlic, minced
1 tsp. honey (or sugar)
1/2 tsp. salt
1/4 tsp. ground cumin
Small to medium size handful of cilantro, washed
Juice of 1 lime (about 1 tbsp.)

Combine all ingredients in a blender (or large food processor). Pulse to combine until all ingredients are finely chopped and salsa is the desired consistency. Adjust seasonings to taste. Store in a covered container in the refrigerator.

Yield: About 3 cups of salsa

Recipe source: Found here via Pinterest

Why I love it? As I already wrote, it is delicious, perfect if you like a smoother salsa, and so fast & easy! It's inexpensive, too, and can be made at any time of the year (since it uses canned tomatoes).

Thursday, February 16, 2012

Chocolate Cranberry Biscotti


This week I was signed up to bring Valentine's goodies to my husband's work. I was looking for a dessert that had either red or pink, in addition to the caramel corn & sugar cookies I was already planning. I found this recipe for white chocolate cranberry biscotti on Allrecipes.com, and tried my hand at making biscotti. It was fun! This turns out nothing like the brick-hard packaged biscotti. It's still crisp & crunchy, but not overly so!

I know there are many flavor variations for biscotti, so I'm sure you could use these basic directions and make it your own. I did one batch with white chocolate chips (and dipped one side of them in melted white chocolate), and one batch with semi-sweet chocolate chips. They were both wonderful! From what I read online, these stay fresh for several days in either an airtight container or a ziploc bag. They only lasted a day in my house though!!

(Recipe source: http://allrecipes.com/recipe/white-chocolate-cranberry-biscotti/Detail.aspx)

You divide the dough into 3 parts, and shape each one into a 10x2-inch log.


After the first bake, you let it cool for 5 minutes, then you slice it diagonally like this.


Lay them flat side down on a baking sheet, then bake again until lightly browned.


All done baking!


I dipped them in melted chocolate, then put them on a non-stick mat to set up.


White Chocolate Cranberry Biscotti
Printable version here

Yield: 21 pieces of biscotti, plus end pieces

1/2 cup butter (no substitutes), softened
1 cup sugar
3 eggs
1 tsp. vanilla extract
1/2 tsp. almond extract (optional)
Pinch of salt
3 cups all-purpose flour
1 tbsp. baking powder
3/4 cup dried cranberries
3/4 cup (white) chocolate chips

1. In a mixing bowl, cream butter and sugar. Add eggs, one at a time, beating well after each addition. Beat in extracts. Combine flour, baking powder, and salt; gradually add to creamed mixture. Stir in cranberries and chocolate chips. Divide dough into three portions.

2. On ungreased baking sheets (I used parchment), shape each portion into a 10-in. x 2-in. rectangle. Bake at 350º for 21-22 minutes or until lightly browned. (*I put each portion on its own baking sheet, otherwise they would've run into each other. I baked my 2 smaller sheets at the same time, and my 1 larger sheet on its own after that.) Cool on sheet for 5 minutes.

3. Transfer to a cutting board; cut diagonally with a serrated knife into 1-inch slices. Place cut side down on baking sheets. Bake for 14-15 minutes or until golden brown. Remove to wire racks to cool. Store in an airtight container.

4. (Optional) To dip in chocolate- I used Wilton chocolate candy melts, which are just meant to be easy to melt & dipped in. I heated them in the microwave according to package directions, then poured the melted chocolate into a shallow rectangular dish. I dipped each piece of biscotti into it, then set it on a non-stick mat to set up. You could also set it on waxed paper or parchment paper.

Here's an article someone wrote about how to melt chocolate, if you want to read more about it: http://simplydesigning.blogspot.com/2011/02/how-to-melt-chocolate-for-dipping.html

Why I love it? It was easy to make, even having never made biscotti before. I followed the directions, and it worked! It's delicious, and fancy enough to give as a gift! It can also be made with unlimited variations. I've only made the two I posted about here, but I'd love to hear about any variations that you make, too!

Thursday, December 22, 2011

Christmas Goodies- Caramel Corn & Snickerdoodles

This week I made goodies for Dave to take to work, and his coworkers are requesting the recipes! One of the things in the bag was a pretzel wreath, which is posted below. The others were caramel corn and snickerdoodle cookies. The caramel corn was based off a recipe I found at allrecipes.com, and the cookies were from my Baking Illustrated cook book.


Caramel Corn
Printable version here

7 quarts plain popcorn (made from about 1 cup kernels)
1 cup (2 sticks) unsalted butter
1/2 cup light corn syrup
2 cups (14 oz.) light brown sugar
1 tsp. kosher salt (or 1/2 tsp. table salt)
1/2 tsp. baking soda
1 1/2 tsp. vanilla extract

1. Pop popcorn using your preferred method (here is mine). Place the popcorn in a large roasting pan (or two other large baking pans) and keep warm in a 225º oven.

2. Next, to make the caramel, melt the butter in a 3-quart saucepan set over medium heat. Once the butter is melted, mix in the corn syrup, brown sugar and salt. Increase the heat to medium-high and bring the mixture to a boil. Set a timer for 5 minutes, and keep the butter mixture at a boil, reducing the heat if necessary.

3. Remove the mixture from heat and stir in the baking soda and vanilla extract (this will make the mixture bubble up a little, so keep your hands away). Remove popcorn from the oven, and pour the caramel sauce over it, tossing to coat. Bake for 45 minutes to 1 hour (I did an hour), stirring every 15 minutes. The popcorn is done when it is completely crispy when you take a bite.

4. Line the countertop with waxed paper (I used one sheet of waxed paper, plus my pastry mat). Dump the corn out onto the paper and separate the pieces. Allow to cool completely, then store in airtight containers and/or resealable bags. Can be made several days in advance.


Snickerdoodles
Printable version here

2 1/4 cups (11 1/4 oz.) all-purpose flour
2 tsp. cream of tartar
1 tsp. baking soda
1/2 tsp. salt
12 tbsp. (1 1/2 sticks) unsalted butter, softened but still cool
1/4 cup vegetable shortening
1 1/2 cups (10 1/2 oz.) granulated sugar, plus 3 tbsp. for rolling dough
2 large eggs
1 tbsp. ground cinnamon for rolling dough

1. Preheat oven to 400º and line 2 large baking sheets with parchment paper or spray them with nonstick cooking spray. (I also lined one with plain foil, and it worked fine.)

2. Whisk the flour, cream of tartar, baking soda and salt together in a medium bowl; set aside.

3. With a mixer, cream the butter, shortening, and 1 1/2 cups sugar at medium speed until combined, 1 to 1 1/2 minutes. Scrape down the sides of the bowl with a rubber spatula. Add the eggs and beat until combined, about 30 seconds.

4. Add the dry ingredients and beat at low speed until just combined, about 20 seconds.

5. Mix 3 tbsp. sugar and 1 tbsp. cinnamon in a shallow bowl. Scoop the dough into balls, about 1 rounded tablespoon in size (I used a small cookie scoop) and round with your hands. Then roll each ball in the cinnamon/sugar mixture and place it on the baking sheet, spacing them about 2 inches apart. (Note- I found it easiest to roll a sheet or two full of the plain dough balls, then roll them all in cinnamon one at a time. That way my hands weren't getting quite so messy. Also, be sure to not place them too close on the baking sheet or they will run into each other, trust me! My medium baking sheet normally makes 12 cookies, and I could do 7 of these, and my large one that normally bakes 15 could do 9. I found out that chilling the dough beforehand makes them spread less, but either way is fine.)

6. Bake until the edges of the cookies are beginning to set and the centers are soft and puffy, 9 to 11 minutes (I do 9 1/2 minutes). Let the cookies cool on the baking sheets 2-3 minutes before transferring them to a wire rack. Cool completely, then store in an airtight container. Yield: about 4 dozen cookies.


Thursday, December 15, 2011

Pretzel Wreaths

I got this idea a few years ago when I was a Pampered Chef consultant. It looks neat and is SO easy! Which is good, because this time of the year, who has tons of time on their hands? Not me!


All it is is two staggered layers of 5 dipped pretzels, with sprinkles on top


You can also drizzle them with chocolate. This is how I packaged them to give away:


Pretzel Wreaths
Printable version here

Candy melts or almond bark*
Mini pretzels (10 per wreath)
Sprinkles

1. Place candy melts or almond bark in a microwave-safe dish; microwave according to package directions until melted & smooth.

2. Dip rounded bottoms of 5 miniature pretzels, one at a time, into bark; shake off excess. Lay pretzels onto parchment (or waxed) paper in a circular pattern with sides touching and rounded sides toward center.

3. Repeat with 5 additional pretzels, placing directly on top of first circle in a staggered circular pattern. Decorate wreath as desired. Let stand until set.

Store at room temperature in an airtight container up to 1 week. Do not refrigerate or freeze wreaths or pretzels will lose crispness.

*The amount of candy melts depends on how many wreaths you want to make. You can also substitute regular chocolate chips, melted and mixed with a little vegetable shortening (the ratio I found online was 8 oz. chips to 1 tbsp. shortening).

Why I love it? They are so quick to make- especially if you make them on a lined cookie sheet, and put it in the fridge for a few minutes. I think one of them makes a nice little gift for the holidays.

Wednesday, November 23, 2011

Easy Popcorn

I found a recipe on a blog recently (here) that just blew my mind. It said you can cook popcorn in a paper bag in the microwave, with nothing but kernels in the bag- and it would turn into popcorn. I found that hard to believe. If it was true, why were there so many kinds of popcorn in little plastic-wrapped packages? I've also seen microwaveable popcorn makers, and had been thinking of buying one of them. Surely you need some kind of special equipment...

So, with much disbelief, I tried it last week- and it WORKED! Seriously, no one ever told me making popcorn could be that easy! I bought a pack of brown lunch bags from the dollar store, and plain popcorn kernels from the bulk section at WinCo. Look how easy this is!

These are all the ingredients


Put kernels in a bag and fold top over 3 times


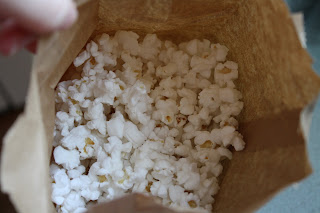
2-3 minutes later, this is what you have!


Put in a bowl, drizzle with butter, sprinkle with salt.


Easy Popcorn

Printable version here

1/4 to 1/3 cup popcorn kernels
1 brown paper lunch bag
Melted butter (about 1 tbsp.), salt, and/or any other toppings

1. Pour the kernels into the brown paper bag. Tightly fold over the top three or four times. No tape or staples are necessary.

2. Put it in the microwave and start it on high for 3 minutes. Listen for the popping to slow down to 3 or 4 seconds apart at which point you will take it out of the microwave.

3. Pour popcorn into a bowl and drizzle with melted butter or spritz with olive oil and then sprinkle with salt. (If you don’t use oil or butter the salt won’t stick.)

Yield: Approximately 3 – 4 servings

Why I love it? It's a quick snack that costs only pennies to make, it makes hardly any dirty dishes, and it's good for you- so much more so than the packaged popcorn!

Monday, August 29, 2011

Oatmeal Applesauce Cookies

I got this recipe out of a low-fat cookbook. I had never made it until today, when I was trying to find something to take to a friend with many dietary restrictions (including no eggs, dairy, or nuts). I wasn't expecting much out of them, but they're actually pretty good! The ingredient list is super simple.


Oatmeal Applesauce Cookies
Printable version here

1/2 cup applesauce
1/2 cup packed brown sugar
1/2 tsp. ground cinnamon
1/8 tsp. nutmeg*
2 cups regular oats

1. Preheat oven to 350º. Spray cookie sheet with non-fat cooking spray or line with parchment paper; set aside.

2. Stir together applesauce, brown sugar, cinnamon and nutmeg until well blended in a medium-sized bowl. Gradually stir in oats until well blended.

3. Drop by tablespoonfuls onto prepared cookie sheet. (I used my small (1 tbsp.) cookie scoop, and when I got a scoop of the oat mixture, I pressed it into the scoop with my finger to help pack it in. That made the cookies hold together better.)

4. Bake for 16 minutes or until lightly golden brown. Cool on a wire rack. Yield: 25 small cookies

** Freshly grated nutmeg is best, and really easy. I just buy a nutmeg from stores that have a bulk spice section (like Fred Meyer or WinCo), and one nutmeg lasts me a long time. It's amazing how much more fragrant it is freshly grated! I didn't measure how much I used in this recipe, I just estimated.

Why I love them? Well, the main reason I like this recipe is because it's very allergy-friendly. Even not counting that, they're just really good! It uses ingredients I always have, is really quick to make and is good for an easy snack for me & the kids. It's fat-free and has fiber (and sugar, so I wouldn't eat a whole batch of them).

Tuesday, June 14, 2011

So-Easy Sugar Cookies

This recipe is from the Pillsbury Bake-Off Contest (in 1982!). If you have a jelly-roll shaped pan, you have to try it. (I'm not sure what the proportions would be for a different sized pan) It's an easy way to make cookies for a crowd, or a bunch of hungry kids!

The batter spread onto the parchment-lined pan, and topped with green sprinkles


Baked & cut into squares with a pizza cutter (yes, I had to taste test one! LOL)


So-Easy Sugar Cookies
Printable version here

3/4 cup sugar
1/3 cup butter (or margarine), softened
1/3 cup oil
1 tbsp. milk
1 1/2 tsp. almond extract
1 egg
1 1/2 cups flour
1 1/2 tsp. baking powder
1/4 tsp. salt
1 tbsp. sugar (or sugar sprinkles)

1. Heat oven to 375. In large bowl, beat 3/4 cup sugar, margarine, oil, milk, almond extract and egg until light & fluffy. Stir in flour, baking powder and salt; blend well.

2. Spread evenly in ungreased 15x10x1-inch baking pan; sprinkle with sugar. (I line with parchment for easier removal) Bake for 10-12 minutes or until light golden brown. (My baking stone pan takes 16 minutes)

3. Cool 5 minutes, then cut into bars with a knife or pizza cutter. Store in an airtight container.

Why I love it? I always have these ingredients on hand, they're really quick to make, and they taste good. I love anything with almond extract, and these have just a hint of that in them. They're just a good, simple cookie!

Saturday, June 4, 2011

Blueberry-Almond Oat Muffins

I found this recipe online recently; it's originally from Pampered Chef. I made it for breakfast this morning with just a few changes. They turned out great!

(These muffins are on my "new" china. My mom just passed down the set that she & my dad got for their wedding. I love it!!)


Blueberry-Almond Oat Muffins
Printable version here

1 1/2 cups all purpose flour
1 cup quick oats
1/2 cup packed brown sugar
1 tbsp. baking powder
1/4 tsp. salt
1 cup blueberries (fresh or frozen)
1 cup milk
1/4 cup butter or margarine, melted
1 egg
1/2 tsp. almond extract
1/4 cup sliced almonds

1. Spray 12-cup muffin tin with nonstick cooking spray (or use paper liners). Preheat oven to 425º.

2. Combine dry ingredients in a large mixing bowl; mix well. Stir in blueberries. In a small bowl, whisk together the milk, butter, egg, and extract. Pour into the dry ingredients & mix just until dry ingredients are moistened.

3. Scoop batter evenly into muffin cups (about 1 rounded large scoop). Put sliced almonds in a small plastic bag, and crush with your hand to break up the pieces a little. Sprinkle over batter, then press down gently. Bake 18 minutes or until golden brown. Remove to a cooling rack; when cool enough to handle, remove from pan & place on rack. Serve warm.

Yield: 12 muffins.

Why I love it? The almonds on top, and the browned exterior, give the muffin a nice crunch, while the inside is soft & fluffy. The oats & blueberries make them a little heartier, but they're still light. They're not too unhealthy for a muffin, either!

Tip- a new product I've been using, and like, is called Baker's Joy. It's a nonstick spray with flour in it. I use it now any time I'm making a cake-type thing. That's what I used for these muffins. It releases the food so easily! I've seen it at most grocery stores, near the Pam.